Curator Help
Events with Tickets & Reservations
Learn how to set up ticketing and RSVPs for your events on Streets
Setting up tickets and reservations for your event lets you control capacity, generate revenue, and collect attendee information. This guide will show you how to configure ticketing options for your Streets events.
Understanding Ticket Types
Streets offers multiple ticket types to match the specific needs of your event:
- Paid Tickets - Set your own price with Streets' straightforward pricing model
- Free Tickets - Provide no-cost tickets with capacity control
- RSVP - Simple reservation system with no payment processing
- Donation - Allow attendees to pay what they want (with optional minimum)
You can offer multiple ticket types for the same event-for example, general admission and VIP tickets at different price points.
Image: The Streets app showcases various ticket types
Creating Ticket Tiers
To add ticket tiers to your event:
- Navigate to your event management page
- Tap Edit on your event
- Scroll to the Tickets section and tap Add Ticket Type
- Choose your ticket type (Paid, Free, RSVP, or Donation)
- Enter the ticket name (e.g., "Early Bird", "General Admission", "VIP")
- Set the ticket price (for paid tickets) or minimum donation amount
- Enter the number of tickets available (capacity)
- Set sales start and end dates/times
- Tap Save to create the ticket tier
Repeat this process to create multiple ticket tiers for your event.
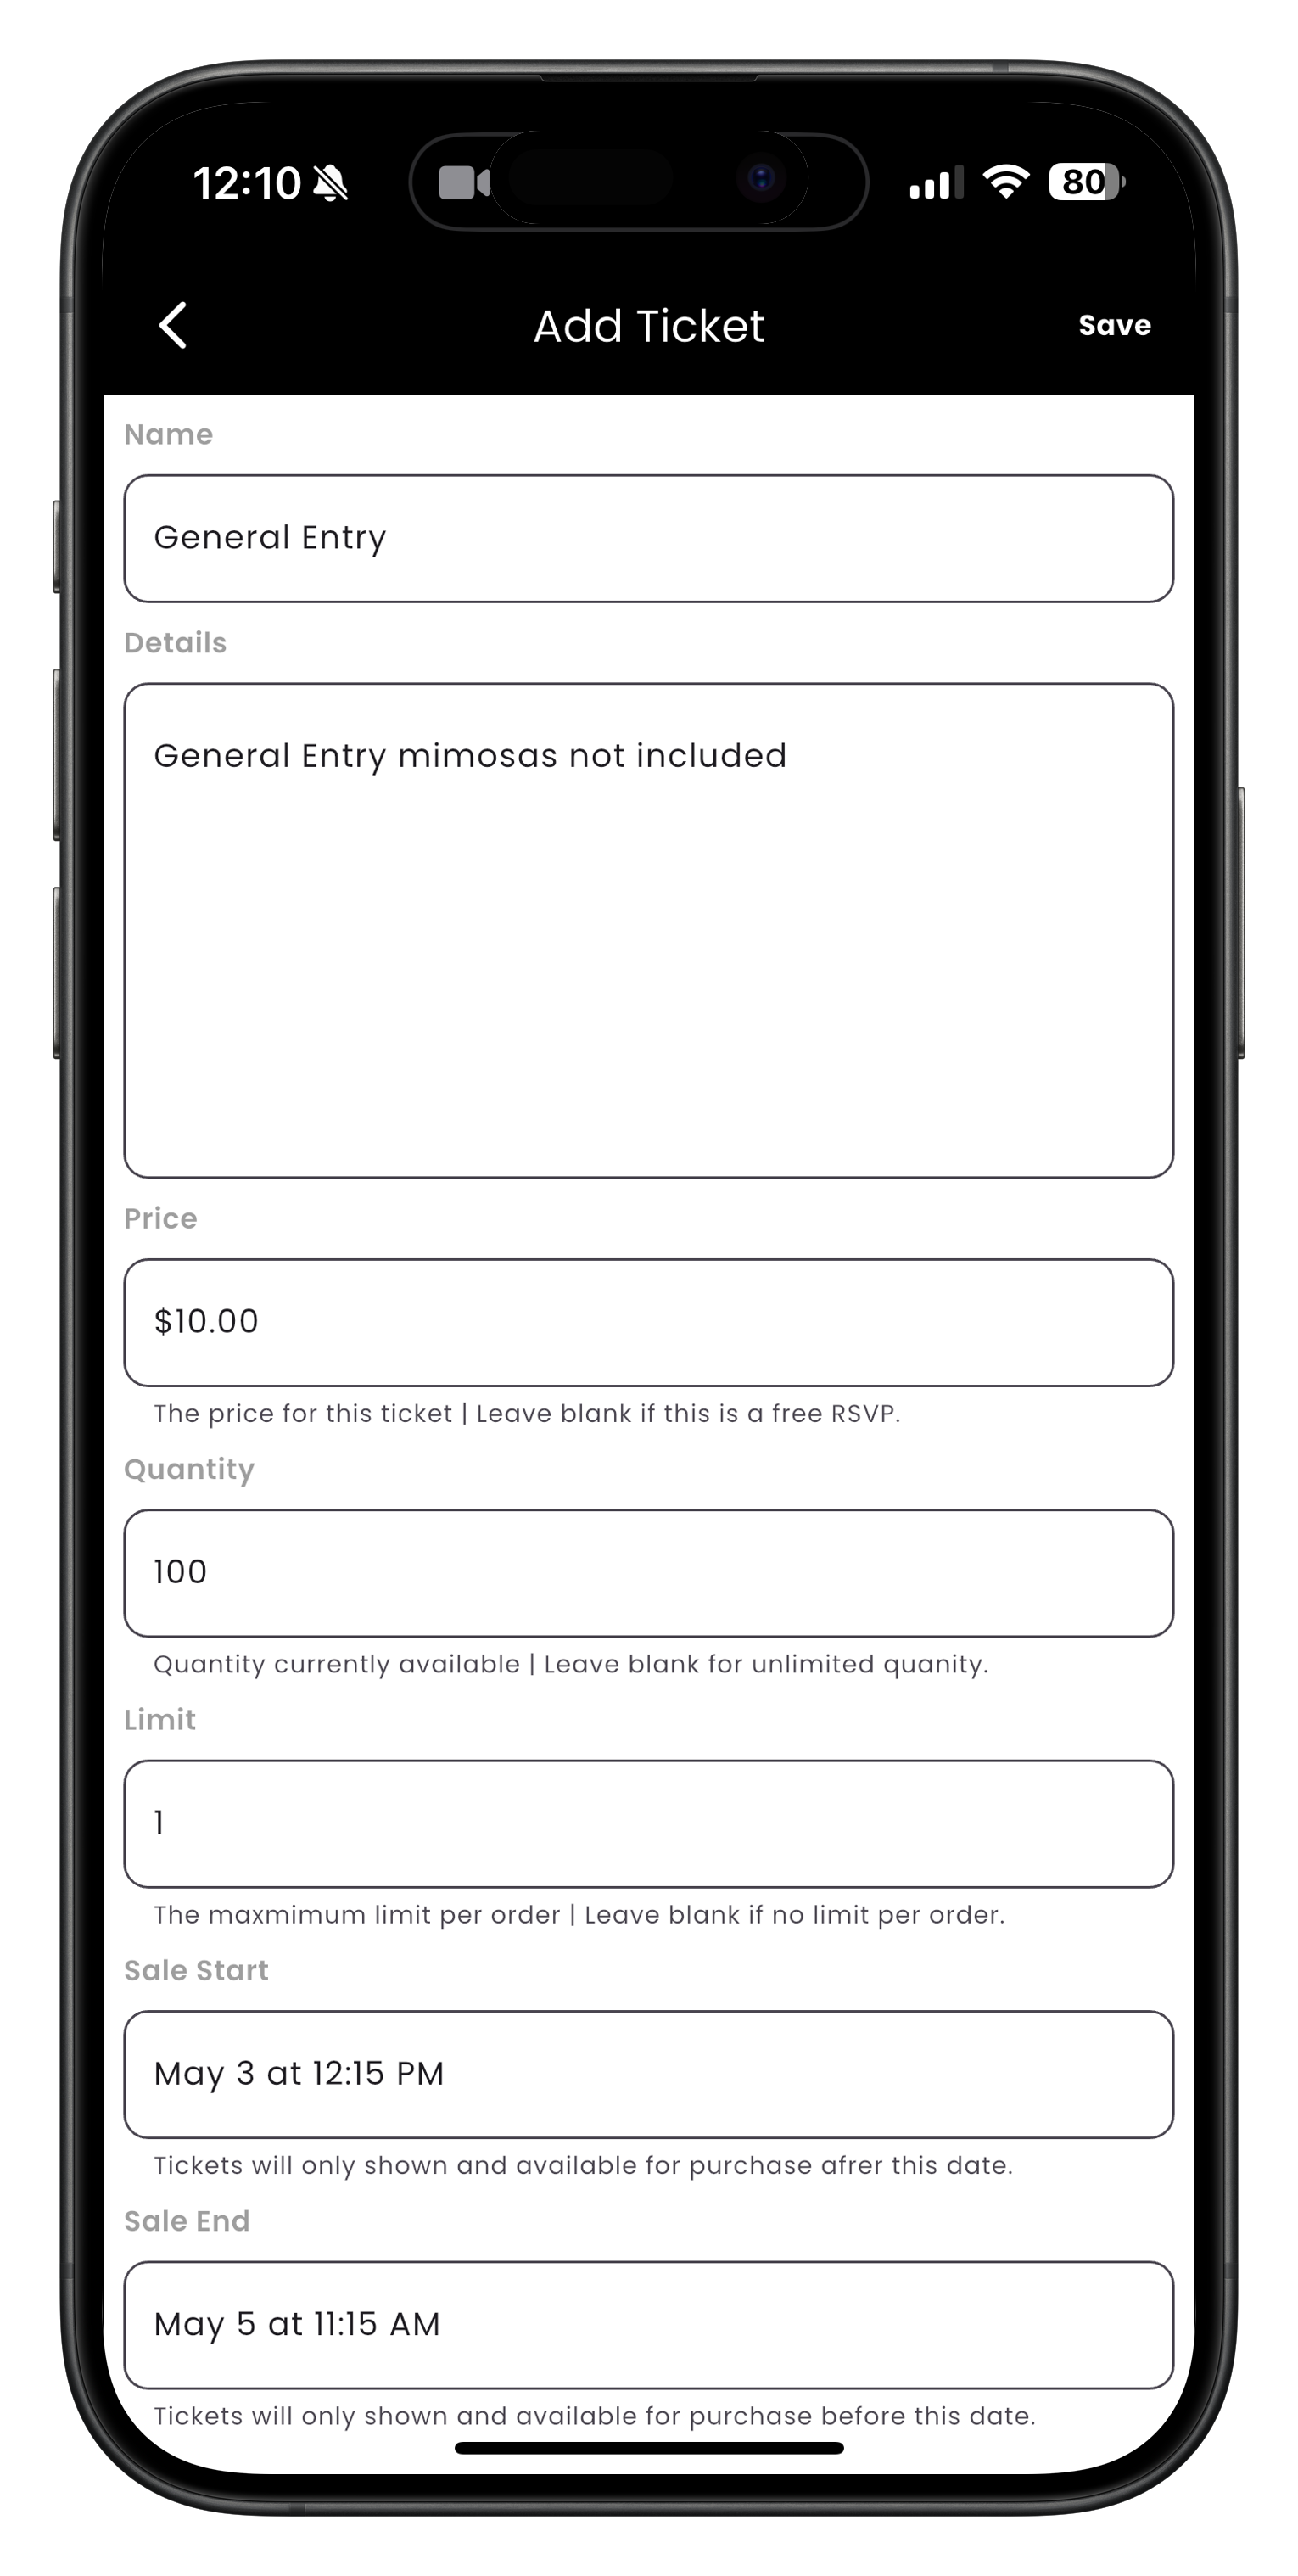
Image: Adding a new ticket tier with pricing and details
Setting Ticket Prices
When setting prices for paid tickets, keep these key points in mind:
- Transparent Pricing - Streets charges a 3% + $1.30 fee to attendees for paid tickets. You keep 100% of your ticket price.
- Minimum Price - The minimum ticket price is $1.00.
- Price Display - Your set price is displayed to attendees with the service fee shown separately.
- Revenue Tracking - Your event dashboard shows all revenue and fees for transparency.
You must connect a Stripe account to sell paid tickets. See our Stripe Connect guide for details.
Configuring Ticket Availability
Control when and how tickets are sold with these settings:
- Sales Start Date/Time - When tickets become available for purchase
- Sales End Date/Time - When ticket sales close (can be at event start or earlier)
- Ticket Quantity - Maximum number of tickets available for this tier
- Per-Person Limit - Maximum tickets one person can purchase (optional)
- Hidden Tickets - Create private tickets only accessible via direct link
Time-based pricing strategies to consider:
- Create an "Early Bird" tier that ends 30 days before the event
- Set up a higher-priced "Last Minute" tier for the final week
- Create date-based pricing tiers to incentivize early purchases

Image: Ticket configuration screen showing options for pricing and customer fees
Managing RSVPs
For more casual events where you don't need payment processing but want to track attendance:
- Create a new ticket tier and select the RSVP type
- Set your RSVP capacity (how many spots are available)
- Configure whether RSVPs require approval or are automatically accepted
- Choose whether guests can bring +1s (and how many)
- Set RSVP start and end dates/times
- Tap Save to create your RSVP option
For exclusive events, enable the "Require Approval" option to manually review and accept RSVPs before confirming spots.

Image: Setting up reservation options for duration and booking intervals
Customizing Ticket Information
Collect additional information from attendees when they purchase tickets:
- When creating or editing a ticket tier, scroll to Custom Fields
- Tap Add Field to create a new information request
- Choose the field type:
- Short Text (for names, allergies, etc.)
- Long Text (for detailed responses)
- Multiple Choice (for predefined options)
- Checkbox (for agreements or opt-ins)
- Enter your question or field label
- Set whether the field is required or optional
- Tap Save Field to add it to your ticket form
Common custom fields to consider:
- Dietary restrictions for events with food
- T-shirt sizes for events with merchandise
- How they heard about your event (for marketing insights)
- Special accommodations needed
- Age verification for 21+ events
Image: Setting up custom fields for tickets
Need More Help?
If you're experiencing issues with setting up tickets or reservations, you can:
- Check our Troubleshooting Guide
- View Frequently Asked Questions
- Contact our Support Team
What's Next?
Now that you've set up tickets for your event, learn how to: