Curator Help
Connect Your Stripe Account
Learn how to set up payment processing for your paid events on Streets
Connecting your Stripe account to Streets allows you to receive payments directly for your paid events. This guide will walk you through the Stripe Connect setup process to start accepting payments quickly and securely.
Why Stripe Connect?
Stripe is a trusted payment processor that enables you to accept credit cards, debit cards, and digital wallet payments for your events. Here's why Streets uses Stripe:
- Direct Payments - Money goes straight to your bank account
- Fast Payouts - Receive funds within 2 business days in most regions
- Security - PCI-compliant payment processing protects your customers' data
- Lower Fees - Streets' business model allows for lower fees than competitors
- Global Support - Accept payments in 135+ currencies in countries worldwide
You must connect a Stripe account to sell paid tickets on Streets. Free events and RSVPs don't require Stripe integration.
Before You Start
To successfully connect Stripe to your Streets account, you'll need:
- A Streets curator account (with verified email)
- Your legal business name or personal name (matching your bank account)
- A phone number for verification
- Banking information (account number and routing number)
- A government-issued photo ID for identity verification
- Your tax information (SSN for individuals or EIN for businesses in the US)
Stripe's verification requirements may vary by country. You may need to provide additional information depending on your location.
Setting Up a Stripe Account
If you don't already have a Stripe account, you'll create one during the Streets connection process. Here's how it works:
- When you attempt to add paid tickets to an event, Streets will prompt you to connect to Stripe
- You'll be directed to create a new Stripe account or connect an existing one
- If creating a new account, Stripe will walk you through providing the necessary information
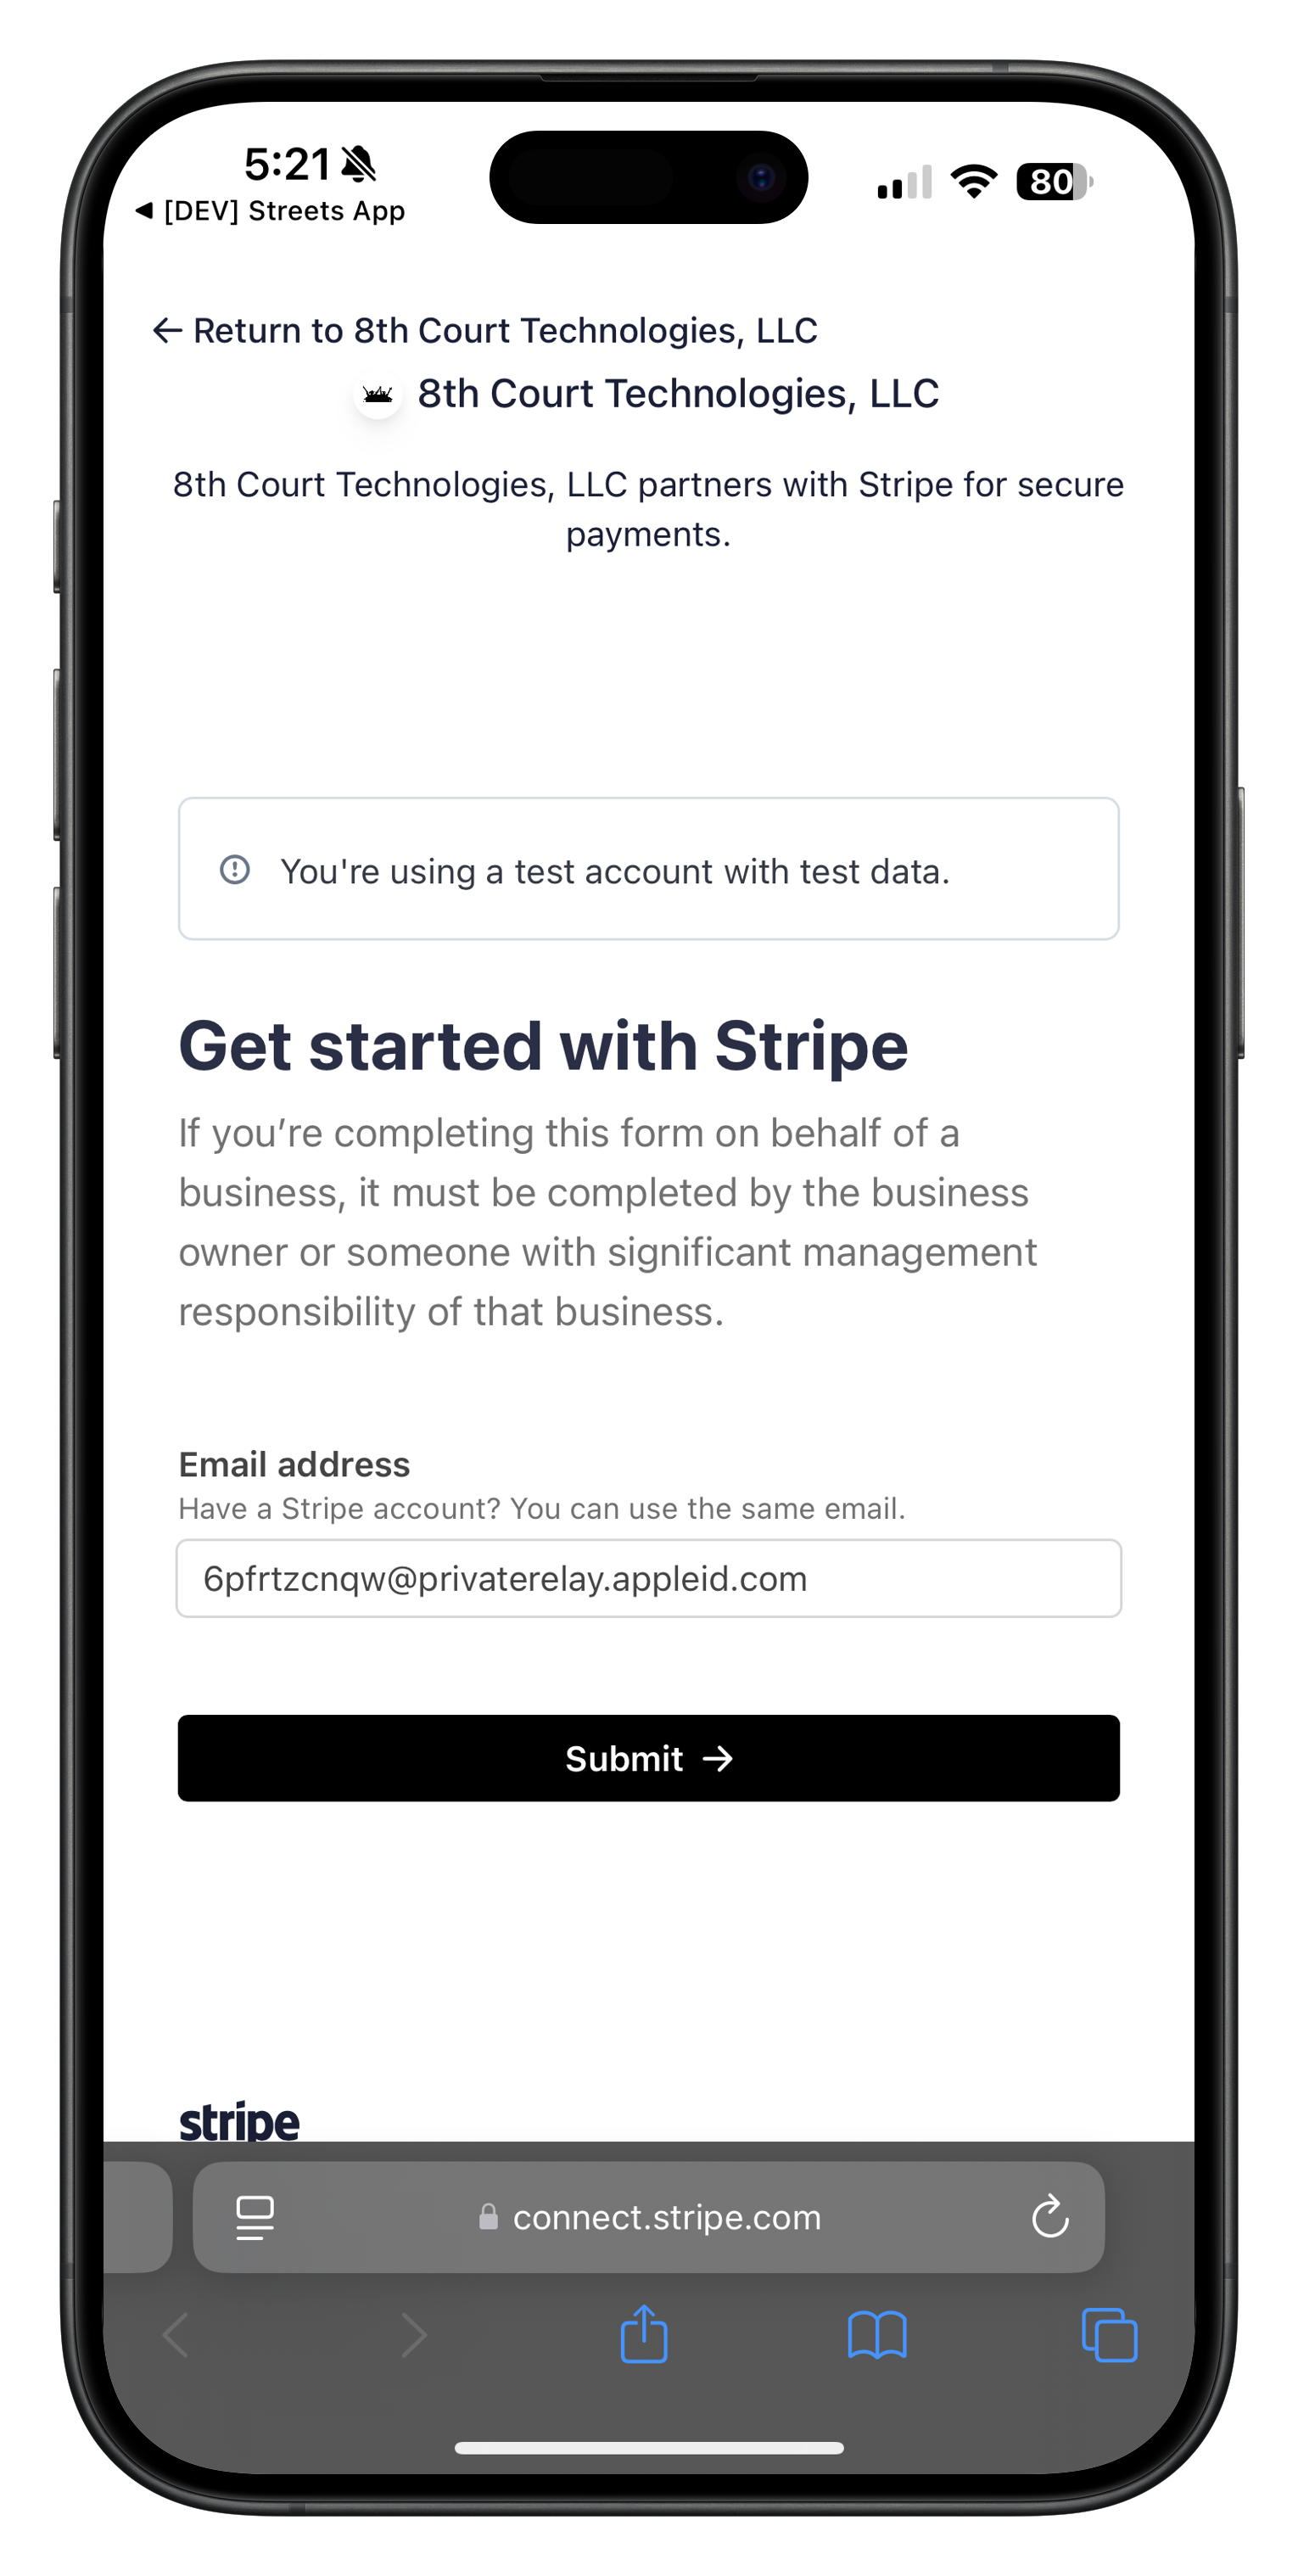
Image: Stripe account setup form where you enter your email address
Setting Up Two-Factor Authentication
For enhanced security, Stripe requires setting up two-factor authentication (2FA) for your account:
- After entering your email, Stripe will prompt you to set up 2FA
- You can use Google Authenticator or another 2FA app
- Enter the verification code shown in your authenticator app
- Alternatively, you can scan a QR code or use a security key

Image: Two-factor authentication setup for your Stripe account
Verifying Your Email
After setting up 2FA, you'll need to verify your email address:
- Stripe will send a verification email to the address you provided
- Check your inbox for an email from Stripe
- Click the verification link in the email
- If you don't see the email, click "Resend email" on the verification screen
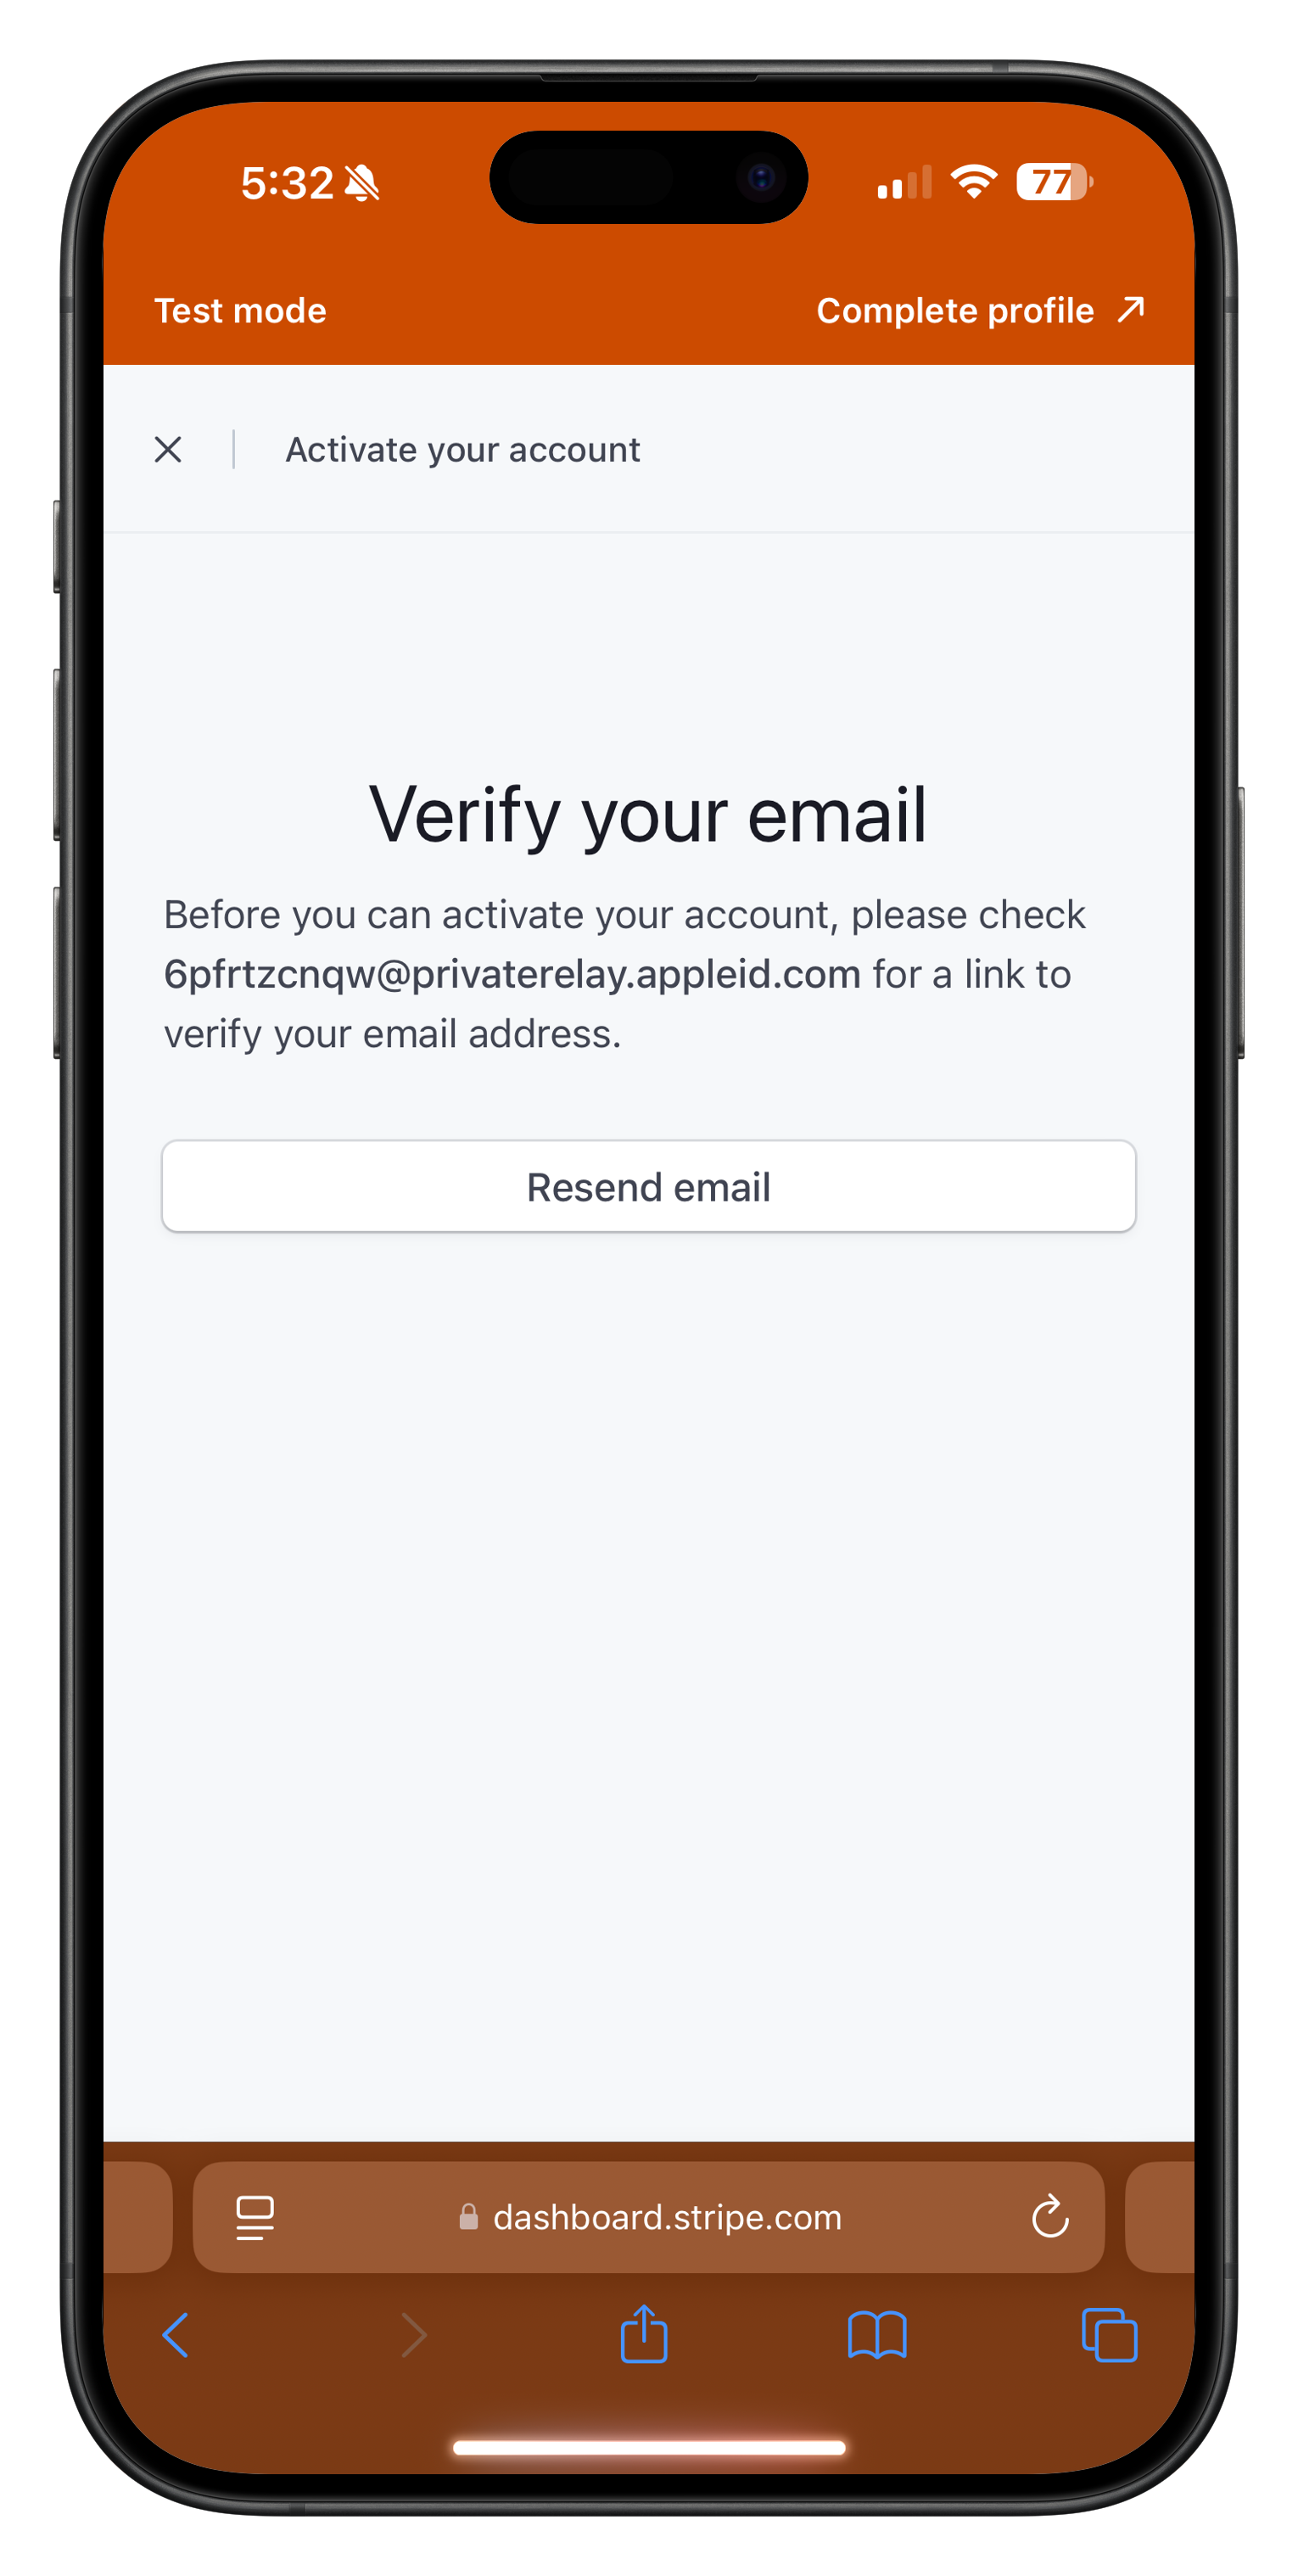
Image: Stripe email verification screen where you can resend the verification email
You won't be able to activate your Stripe account or accept payments until you verify your email address. If you're not seeing the verification email, check your spam folder or try using a different email address.
Once you've verified your email, you'll have access to the Stripe dashboard:
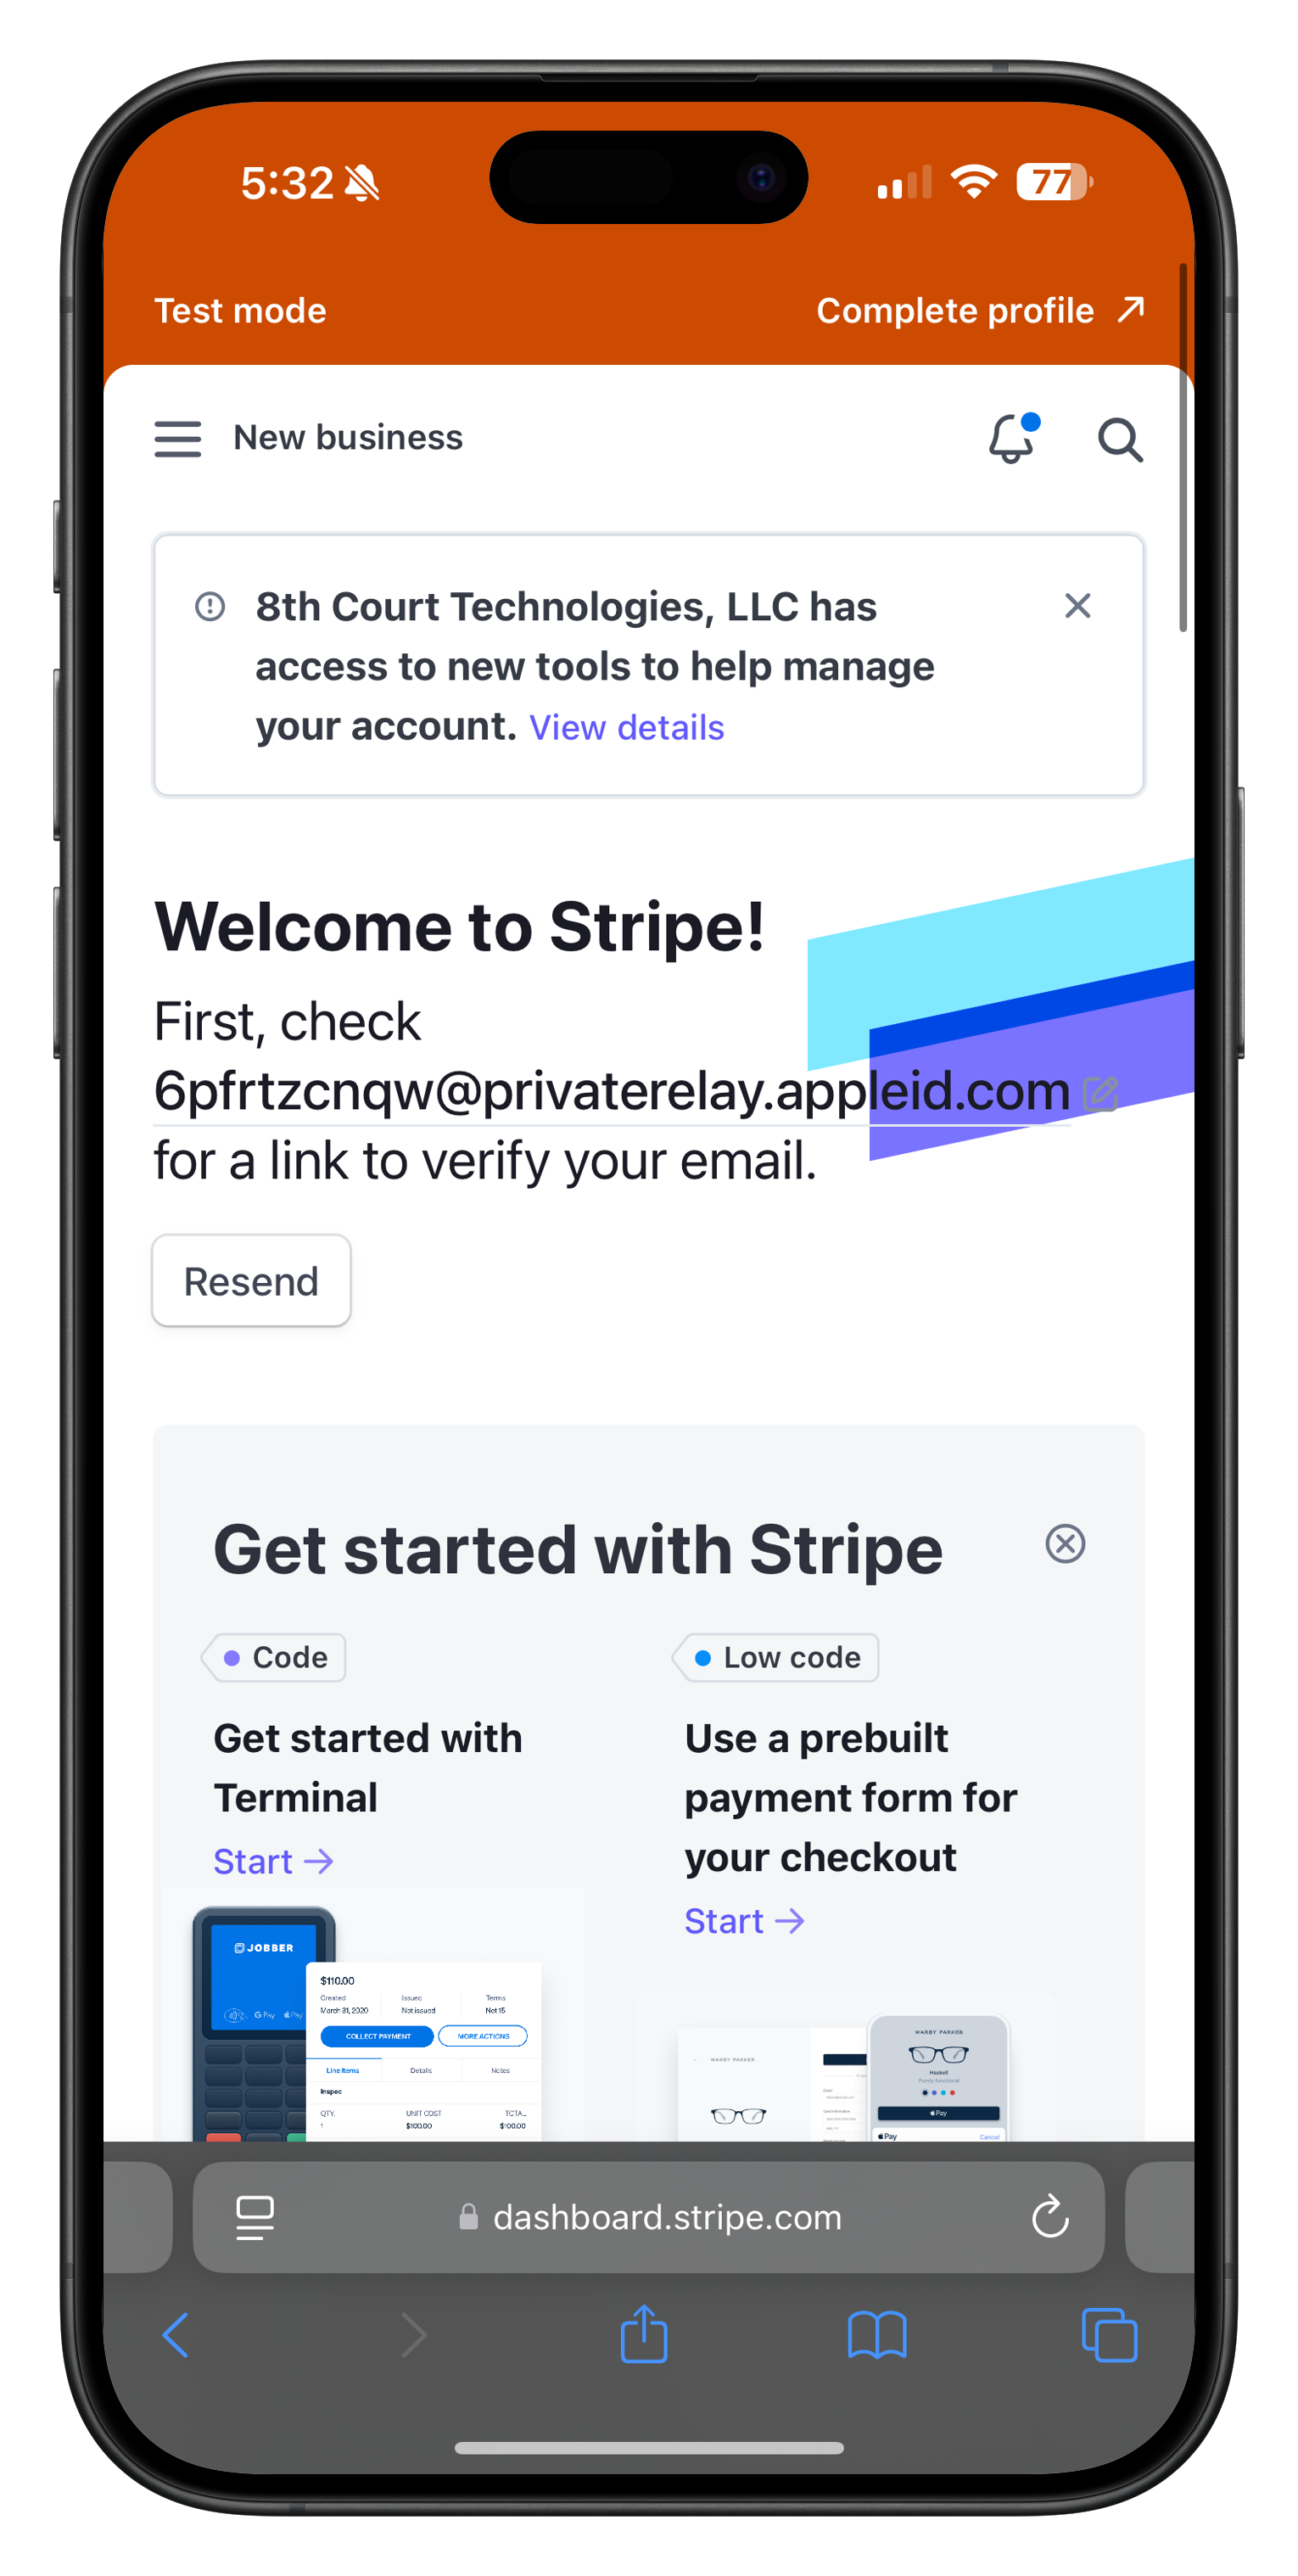
Image: Stripe dashboard welcome screen after email verification
Setting Up Your Business Information
After verifying your email, you'll need to provide your business information:
- Select your business location (country)
- Choose your business type:
- Individual - For sole proprietors or freelancers
- Company - For registered businesses with an EIN
- Non-profit - For registered 501(c)(3) organizations
- Click "Continue" to proceed to the next step
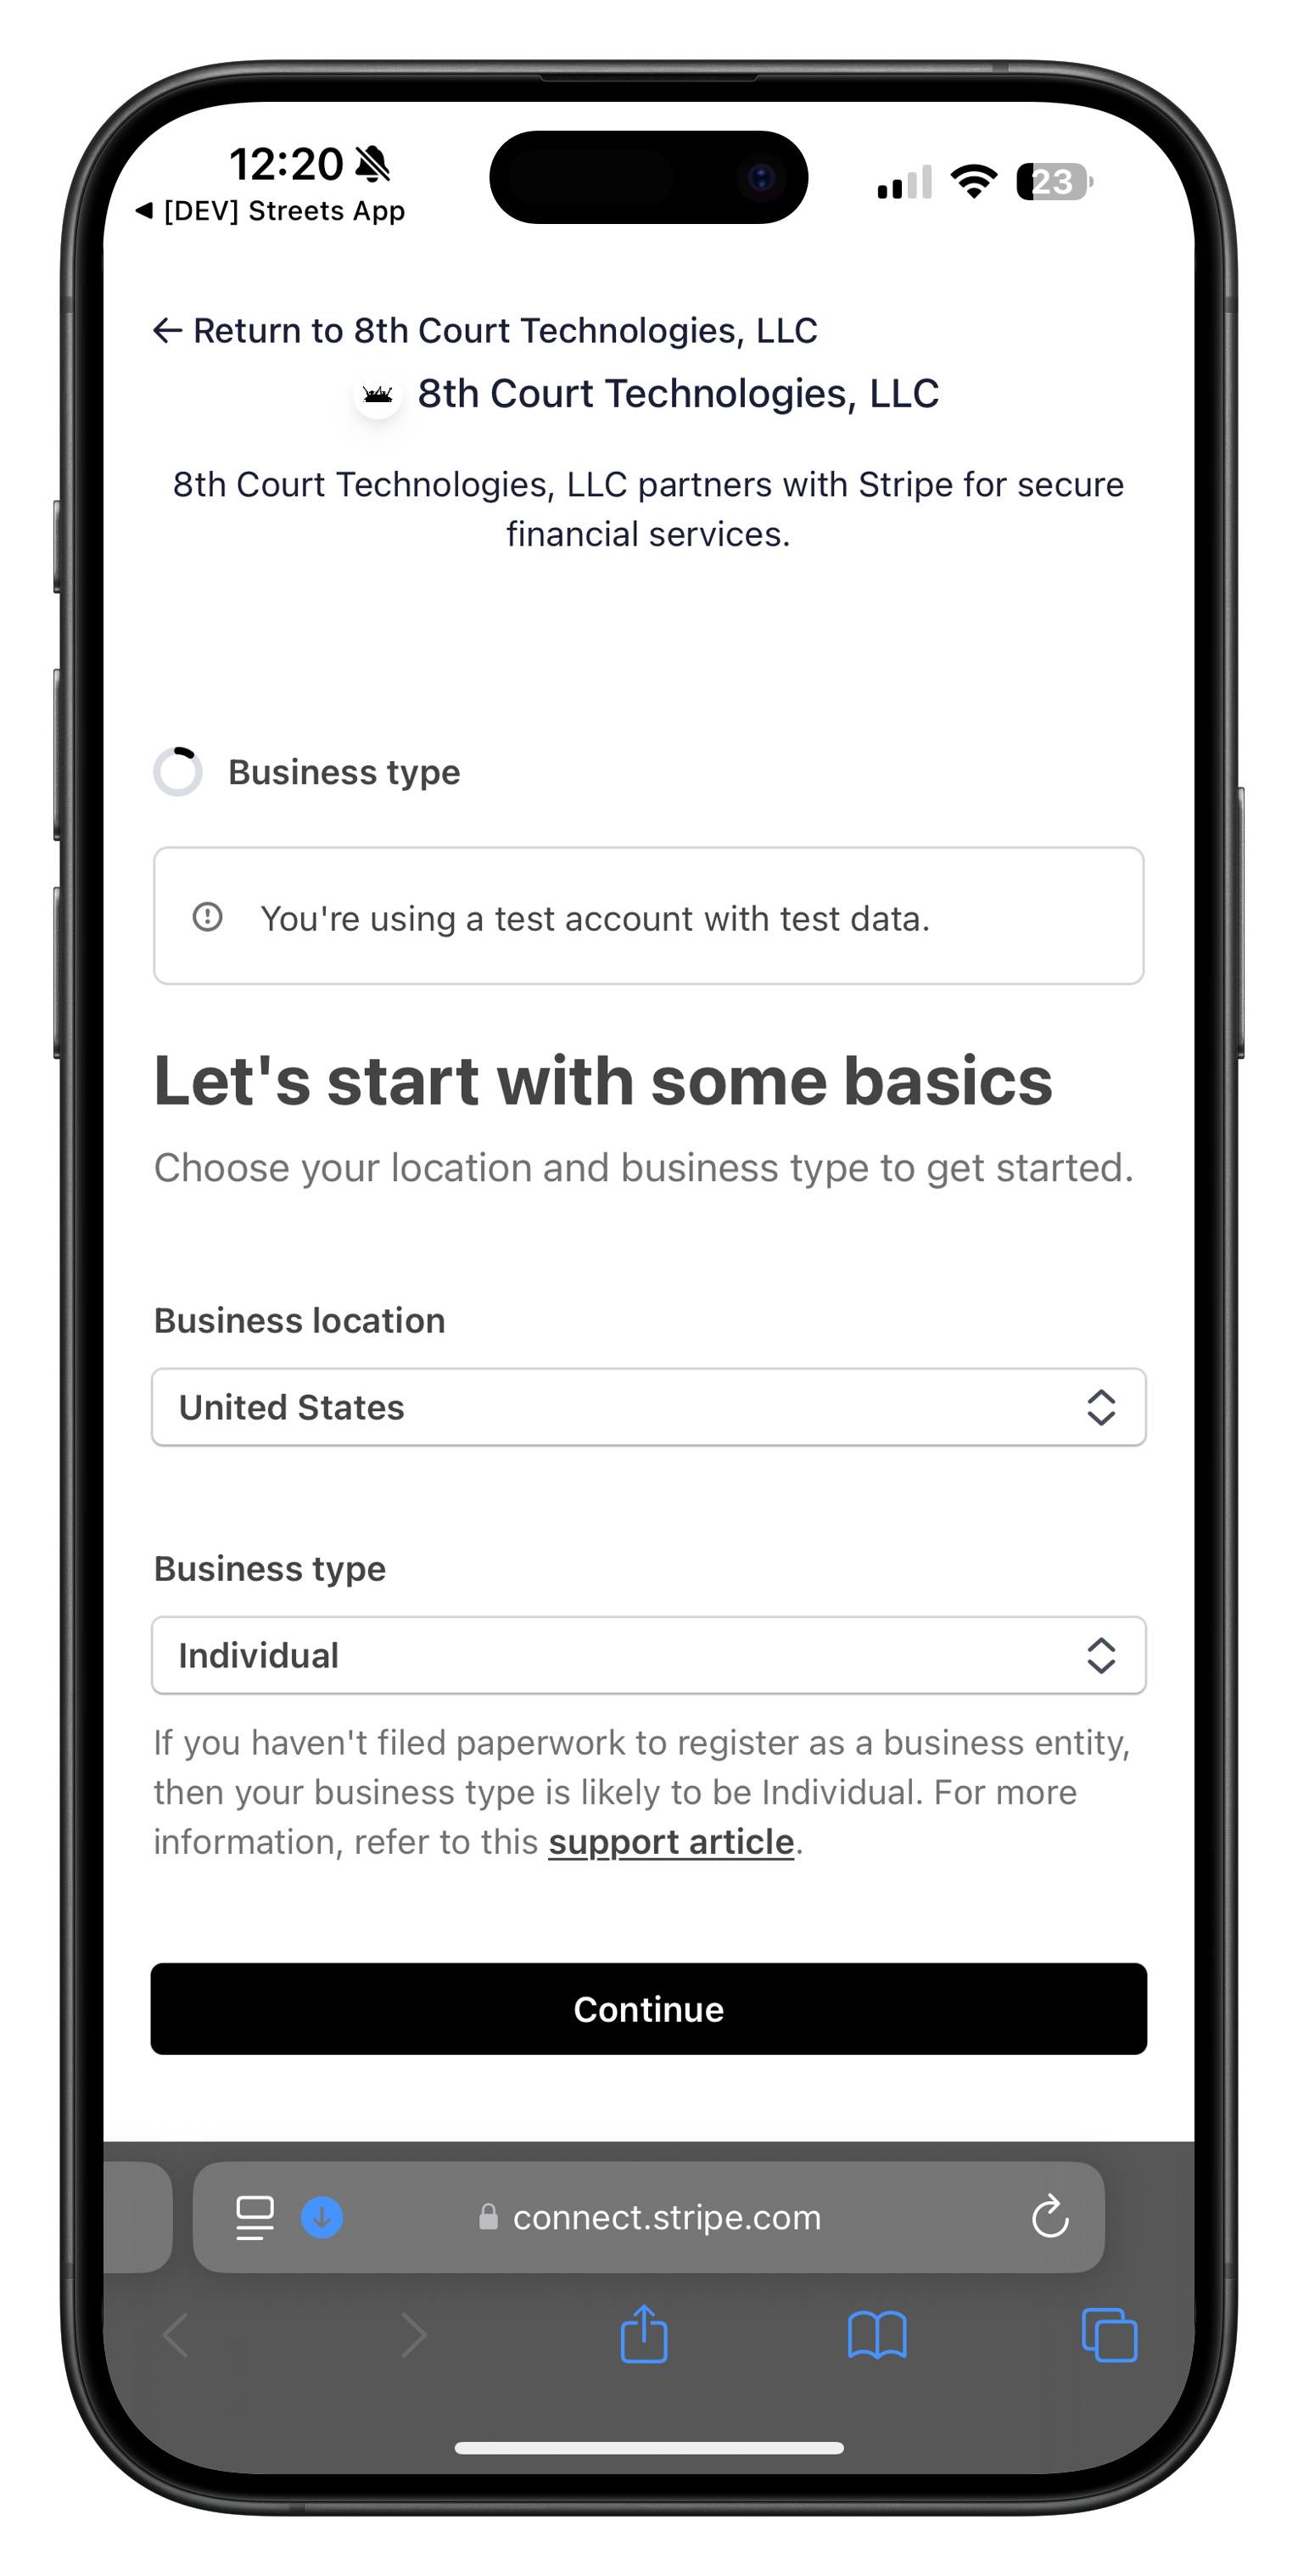
Image: Setting up your business location and type

Image: Selecting your business type from the dropdown
If you're unsure about your business type, "Individual" is usually appropriate for most small event curators. You can still use your personal name as your business name and receive payments as an individual.
Providing Personal Details
After selecting your business type, you'll need to verify your personal details:
- Enter your full legal name exactly as it appears on government IDs
- Confirm your email address
- Provide additional personal information:
- Your date of birth
- Your home address (must be your legal residential address)
- Your phone number for verification
- The last four digits of your Social Security Number (for US individuals)
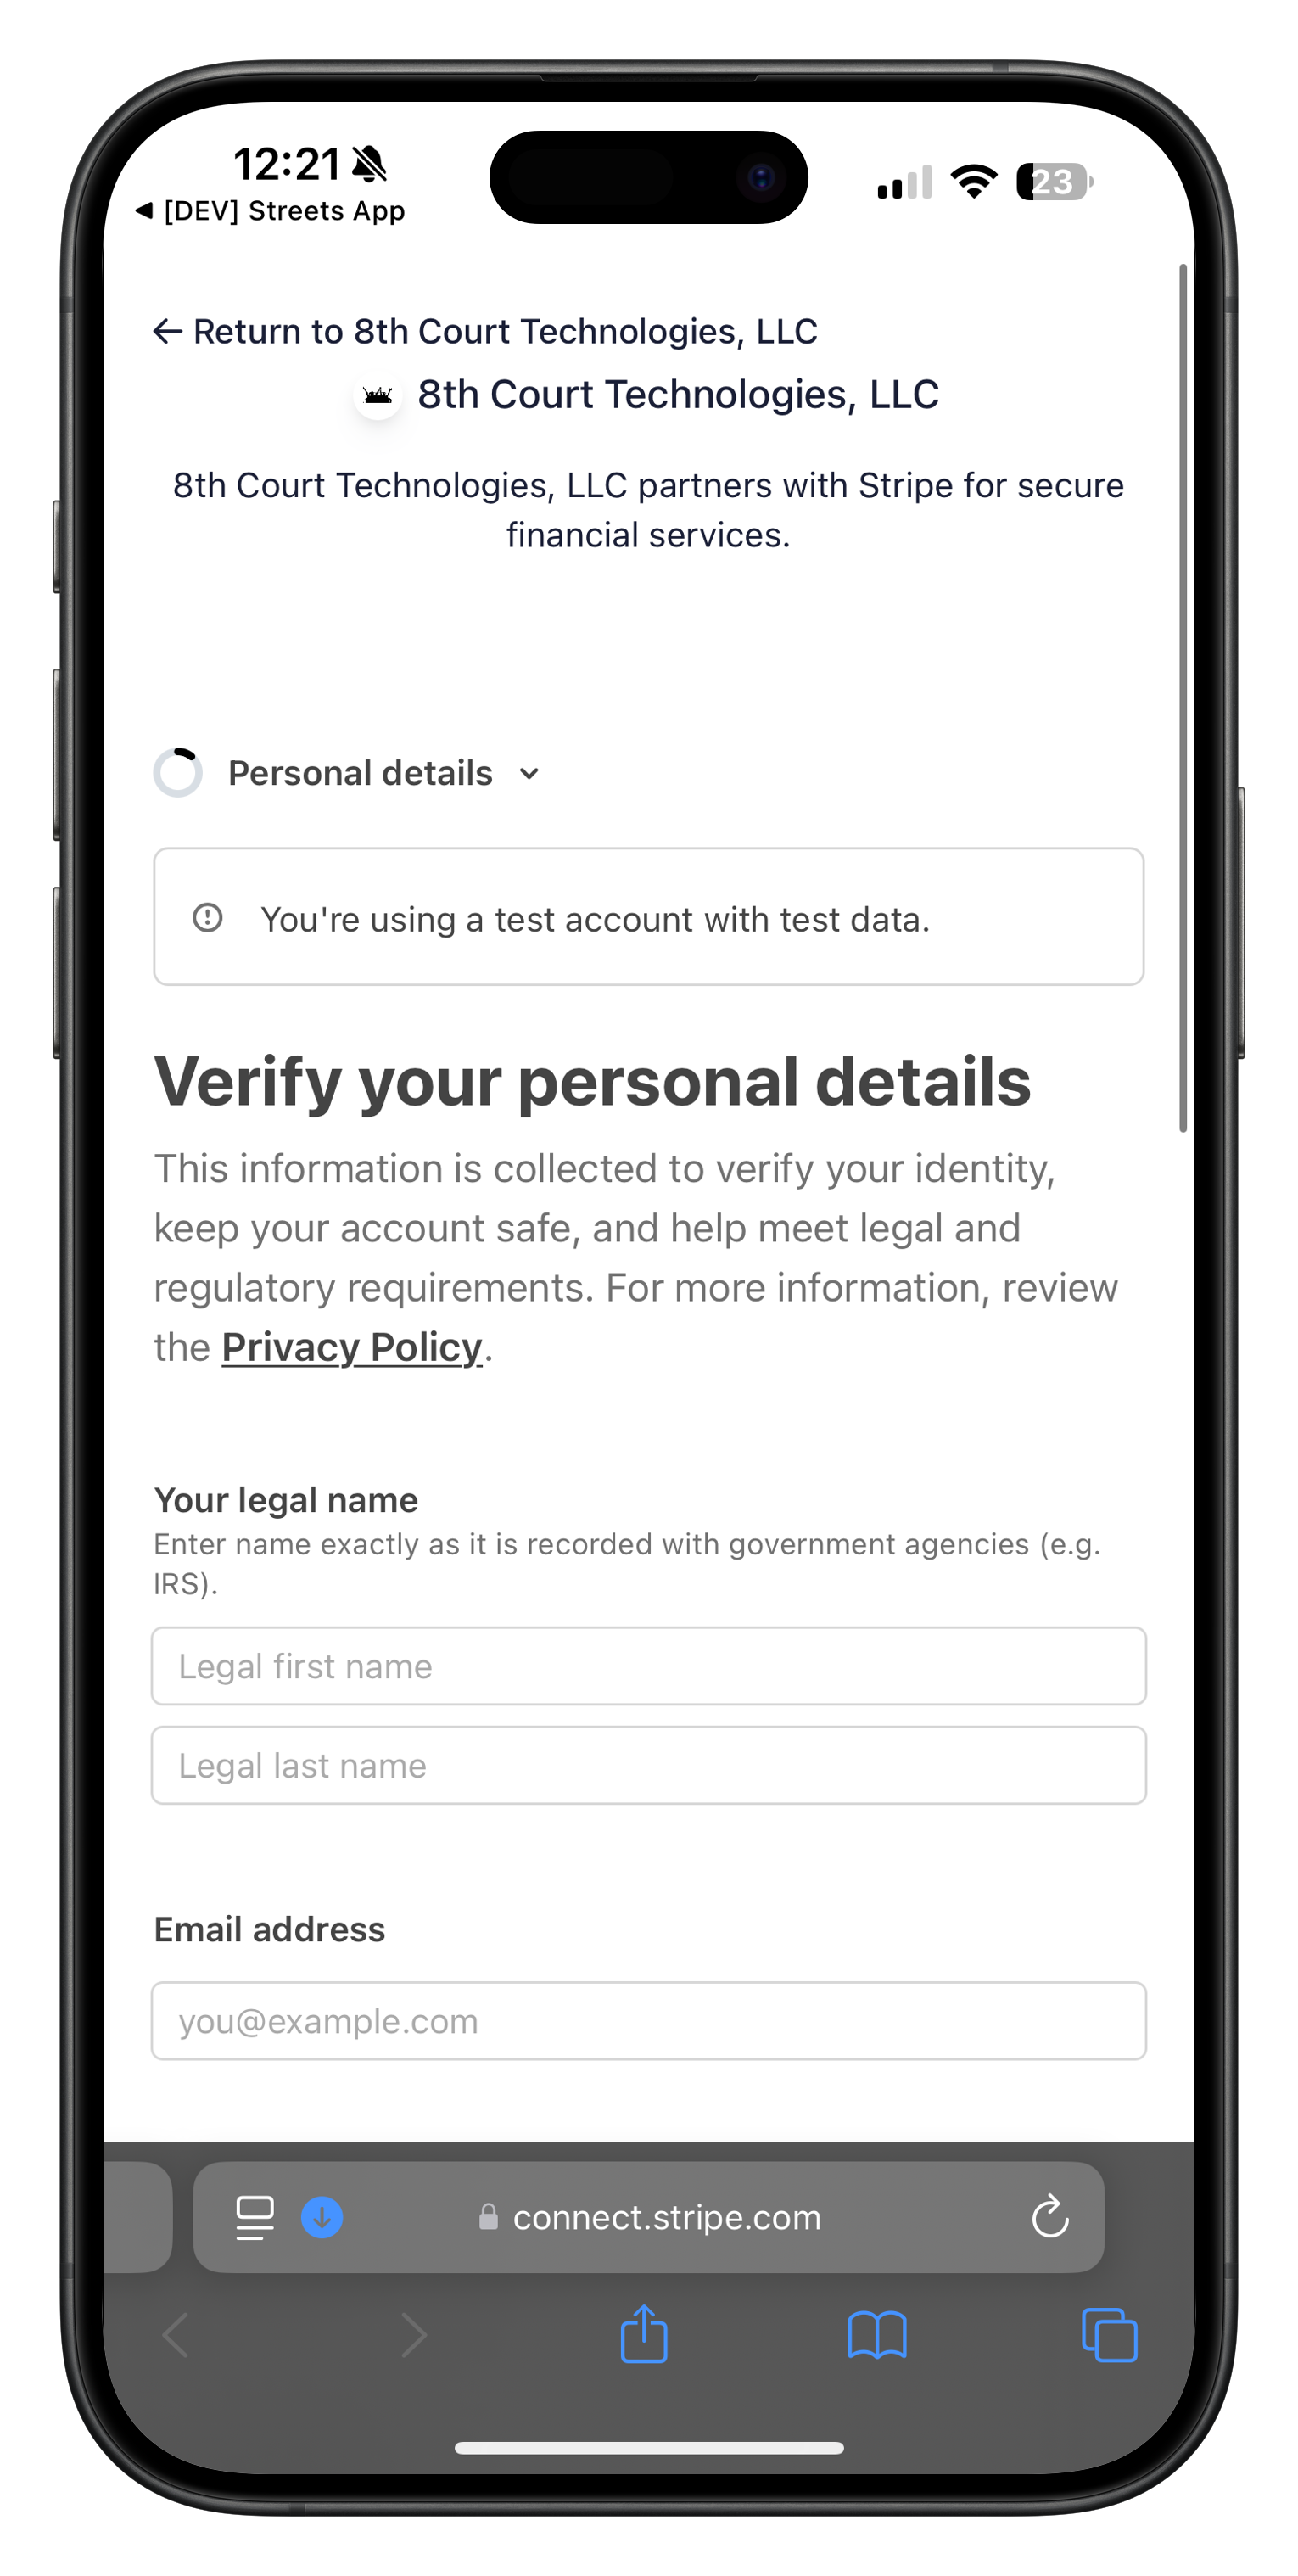
Image: Initial personal details form
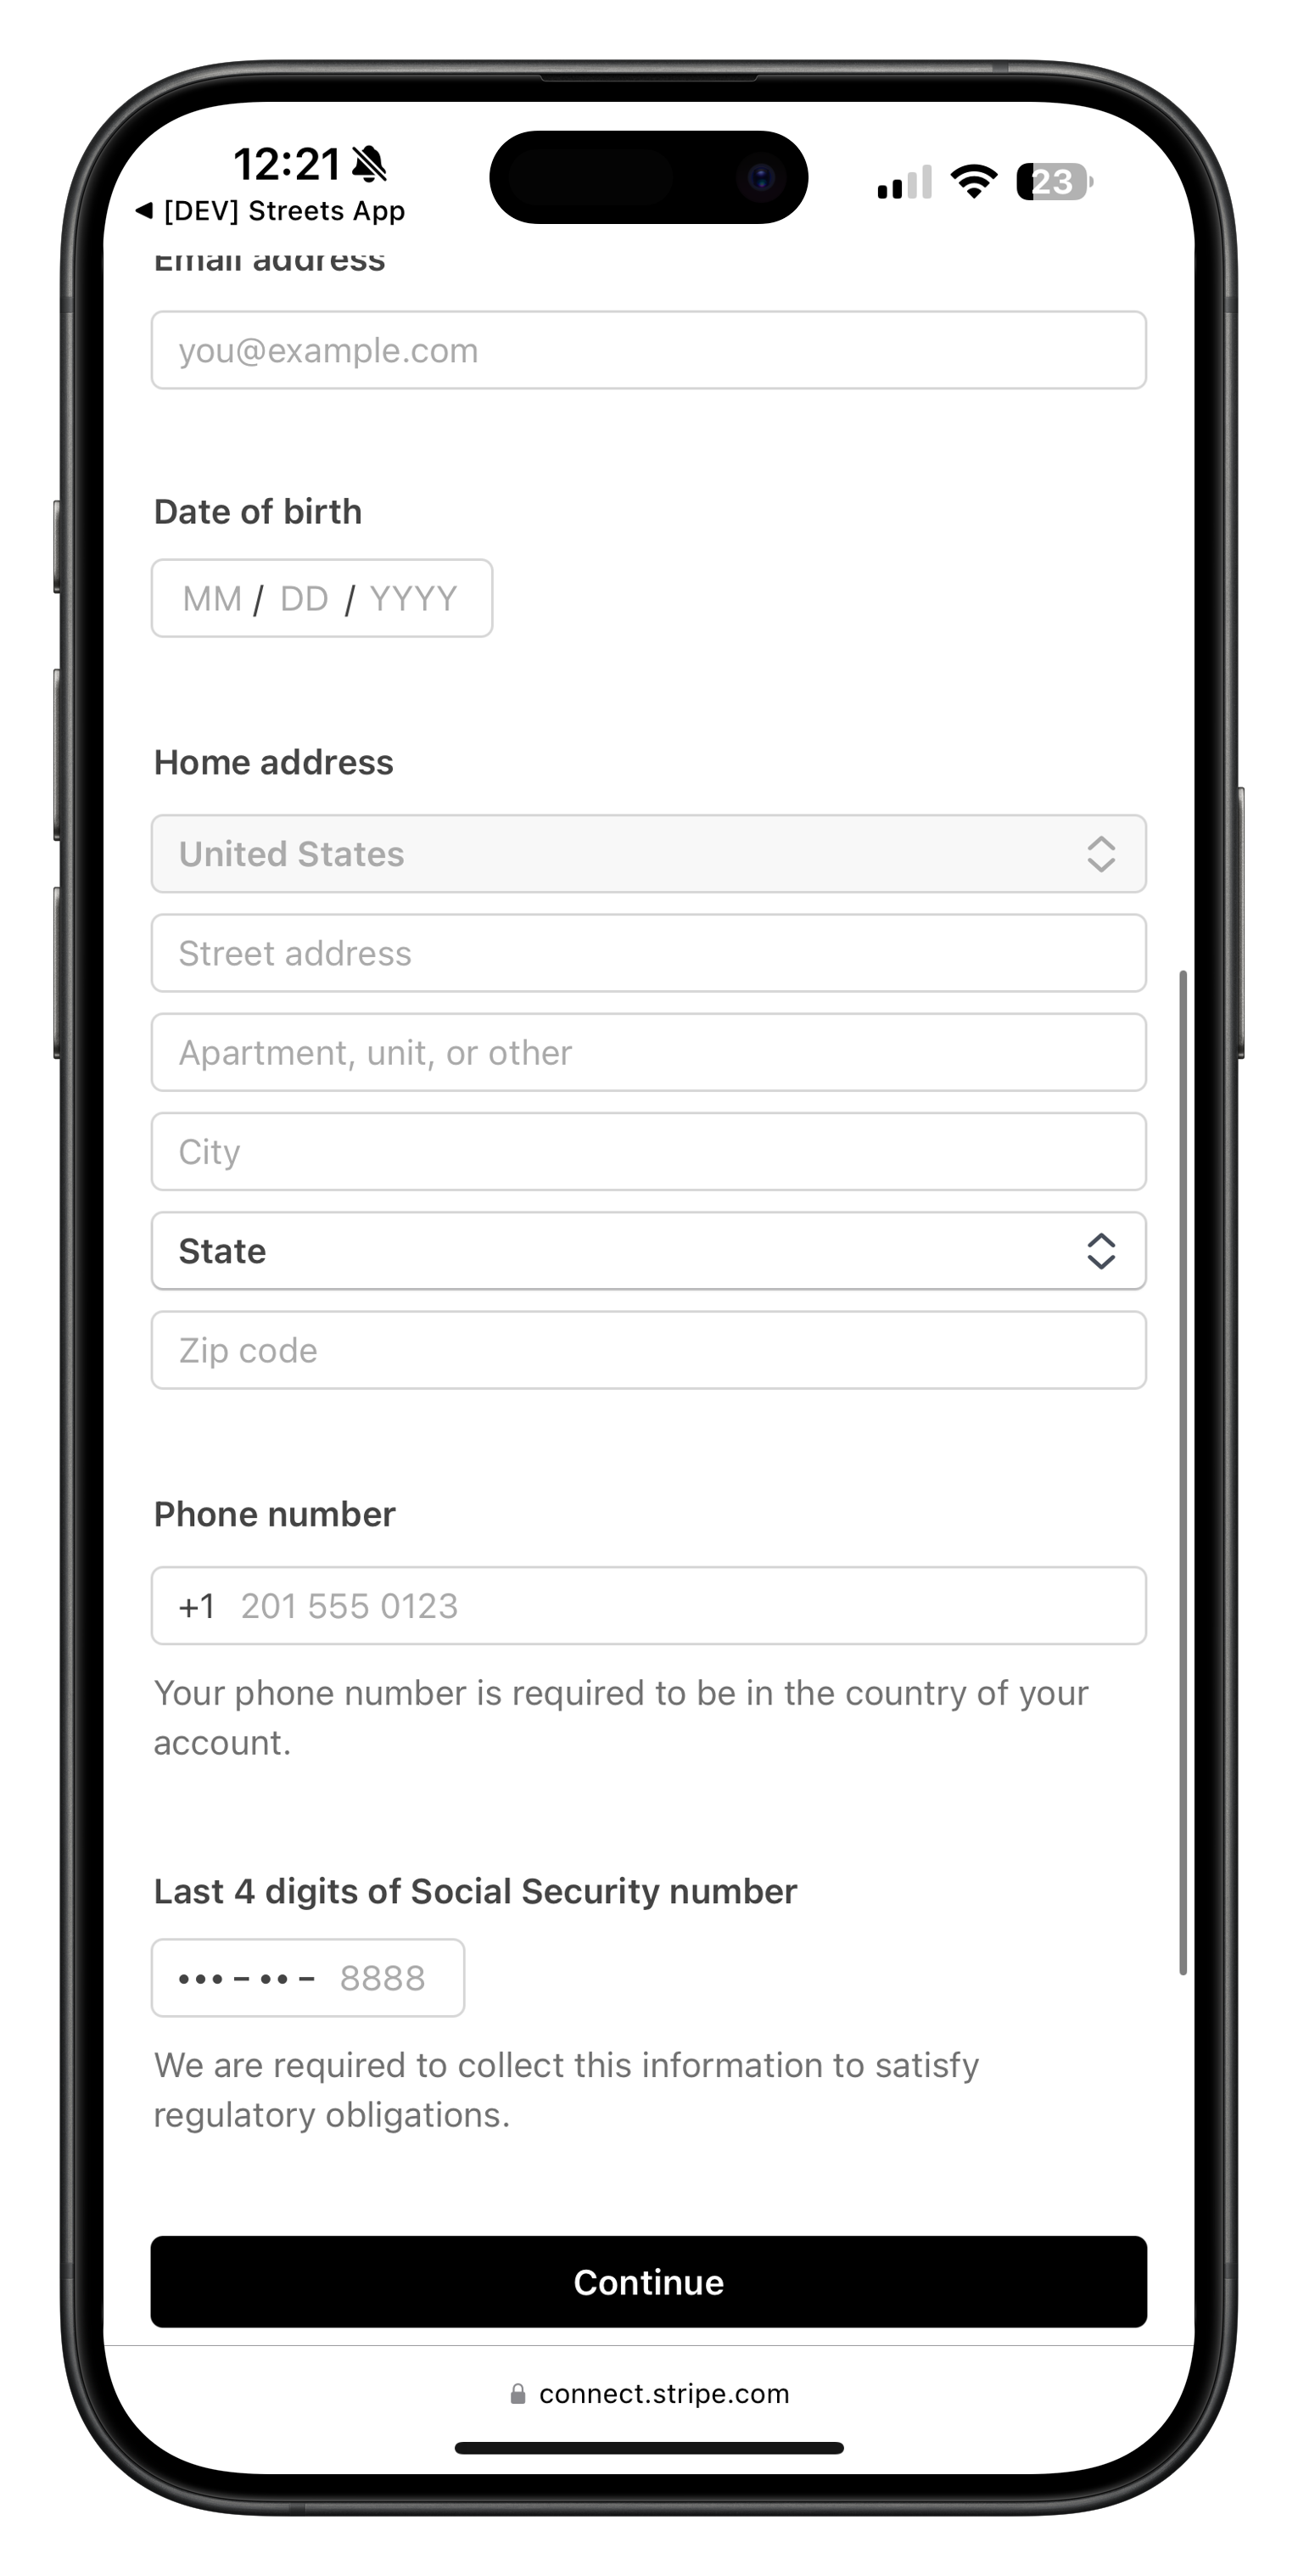
Image: Additional personal information required
Make sure all information provided matches your government ID and tax documents exactly. Discrepancies can lead to verification issues that delay your ability to receive payments. Stripe requires this information to comply with financial regulations and prevent fraud.
Adding Business Details
After verifying your personal information, you'll need to provide business details:
- Select your industry from the dropdown menu
- Enter your business website (if applicable)
- Provide a description of the products/services you'll be selling
- This information helps Stripe categorize your business appropriately
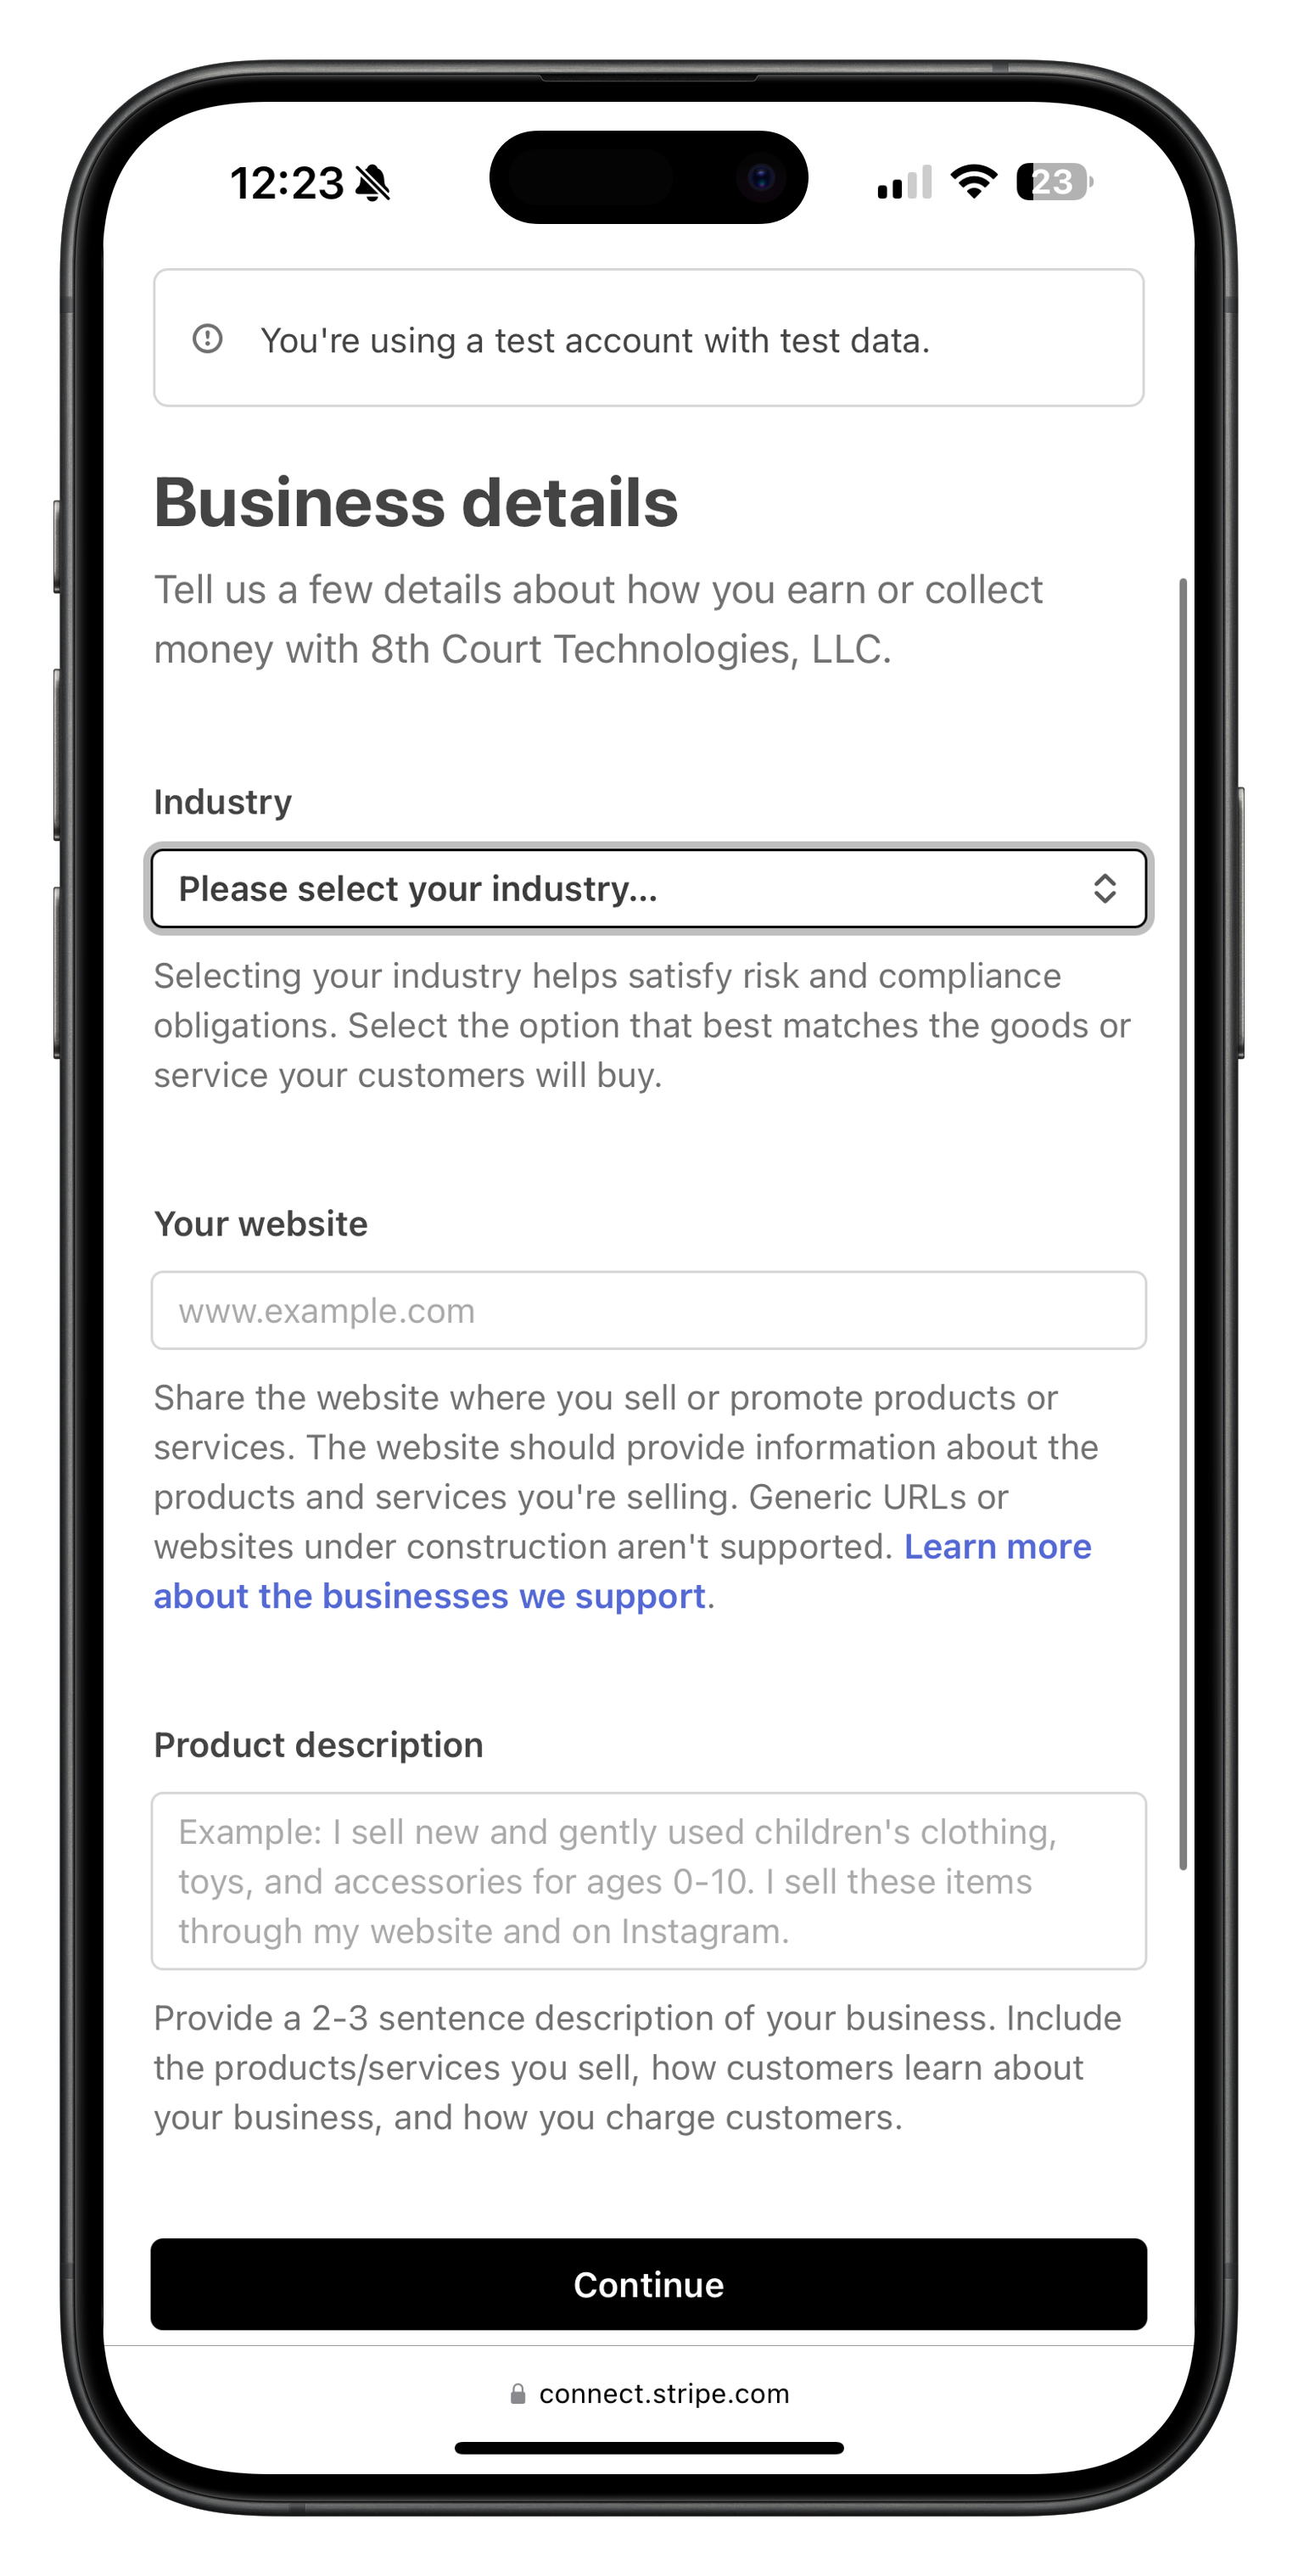
Image: Business details setup screen in Stripe
Once your account is set up, it will be active and ready to use:

Image: Account active confirmation screen in Stripe dashboard
If you prefer to set up your Stripe account before connecting it to Streets, you can:
- Visit Stripe.com and click "Start now"
- Enter your email address and create a password
- Provide your business details and contact information
- Add your bank account information for payouts
- Complete the verification process
Connecting Stripe to Streets
To connect your Stripe account to Streets:
- Open the Streets App
- Tap on Settings in the bottom navigation
- Select Payment Settings
- Tap Connect with Stripe
- Choose whether to create a new Stripe account or connect an existing one
- Follow the on-screen prompts to complete the process
Alternatively, you can connect Stripe when setting up paid tickets:
- When creating or editing an event, add a paid ticket tier
- When you try to save the event, Streets will prompt you to connect with Stripe
- Tap Connect Stripe Account and follow the steps

Image: Link to Stripe screen explaining the connection process
Accepting Terms of Service
During the connection process, you'll need to review and accept the Streets Terms of Service for business users:
- Read the Terms of Service Agreement prompt
- Tap "View Terms of Service" to review the full terms (recommended)
- After reviewing, tap "Agree" to continue with the Stripe connection process

Image: Terms of Service Agreement dialog when connecting with Stripe
Verifying Your Account
Stripe requires account verification to comply with financial regulations and ensure security. The verification process typically includes:
- Identity Verification - Uploading a photo of your government-issued ID
- Business Verification - Providing business information if you're operating as a company
- Banking Information - Adding your bank account details for receiving payouts
- Tax Information - Providing your SSN (for US individuals) or EIN (for US businesses)
Follow these steps to complete verification:
- After connecting your Stripe account, you'll be guided through the verification steps
- Complete each section by providing the requested information
- Upload any required documents (ID, business registration, etc.)
- Submit your information for review
- Wait for verification confirmation (typically within 24-48 hours)
You won't be able to receive payments until your Stripe account is fully verified. Make sure to complete all verification steps well before your event's ticket sales begin.
Managing Payout Settings
Once your Stripe account is connected and verified, you can manage your payout settings:
- Log in to your Stripe Dashboard at dashboard.stripe.com
- Navigate to Settings > Payout settings
- From here, you can:
- View your bank account information
- Change your payout schedule (daily, weekly, monthly)
- Update your bank account details
- Set up additional payout accounts for different currencies
For events with high ticket volumes, consider changing your payout schedule to daily to improve your cash flow. For smaller events, a weekly payout might be more practical.
Understanding Transaction Fees
Streets has a transparent fee structure for paid events:
- Platform Fee: $0 (Streets charges no platform fee to event organizers)
- Customer Fee: 3% + $1.30 per ticket (paid by the attendee, not you)
- Stripe Processing Fee: Included in the customer fee
This means you keep 100% of your ticket price. For example:
Example: $50 Ticket
- Ticket price: $50.00
- Customer fee: $2.80 (3% of $50 = $1.50, plus $1.30 flat fee)
- Total charged to attendee: $52.80
- Amount you receive: $50.00 (100% of your ticket price)
Troubleshooting Stripe Connect
Common issues and their solutions:
Verification taking too long
If verification has been pending for more than 48 hours, check your email for requests for additional information from Stripe, or contact Stripe support directly.
Connection error between Streets and Stripe
If you receive an error when trying to connect your accounts, try disconnecting and reconnecting. Go to Settings > Payment Settings > Disconnect Stripe, then try connecting again.
Payouts not appearing in your bank account
First-time payouts typically take 7-10 days to appear. Subsequent payouts follow your chosen schedule. If payouts are still missing after this period, verify your bank details in your Stripe Dashboard.
Unable to add paid tickets
Ensure your Stripe account is fully verified. Incomplete verification can prevent you from creating paid tickets even if your account is connected.
Need More Help?
If you're experiencing issues with Stripe Connect, you can:
- Check our Troubleshooting Guide
- View Frequently Asked Questions
- Contact our Support Team
- Reach out to Stripe Support for payment-specific issues
What's Next?
Now that you've connected your Stripe account, learn how to: