Curator Help
How to Create an Event on Streets
Step-by-step tutorial for creating and setting up an event on the Streets app
Whether you're organizing a brunch, club night, or concert, the Streets App makes it easy to create and promote your events. This guide walks you through the process step by step.
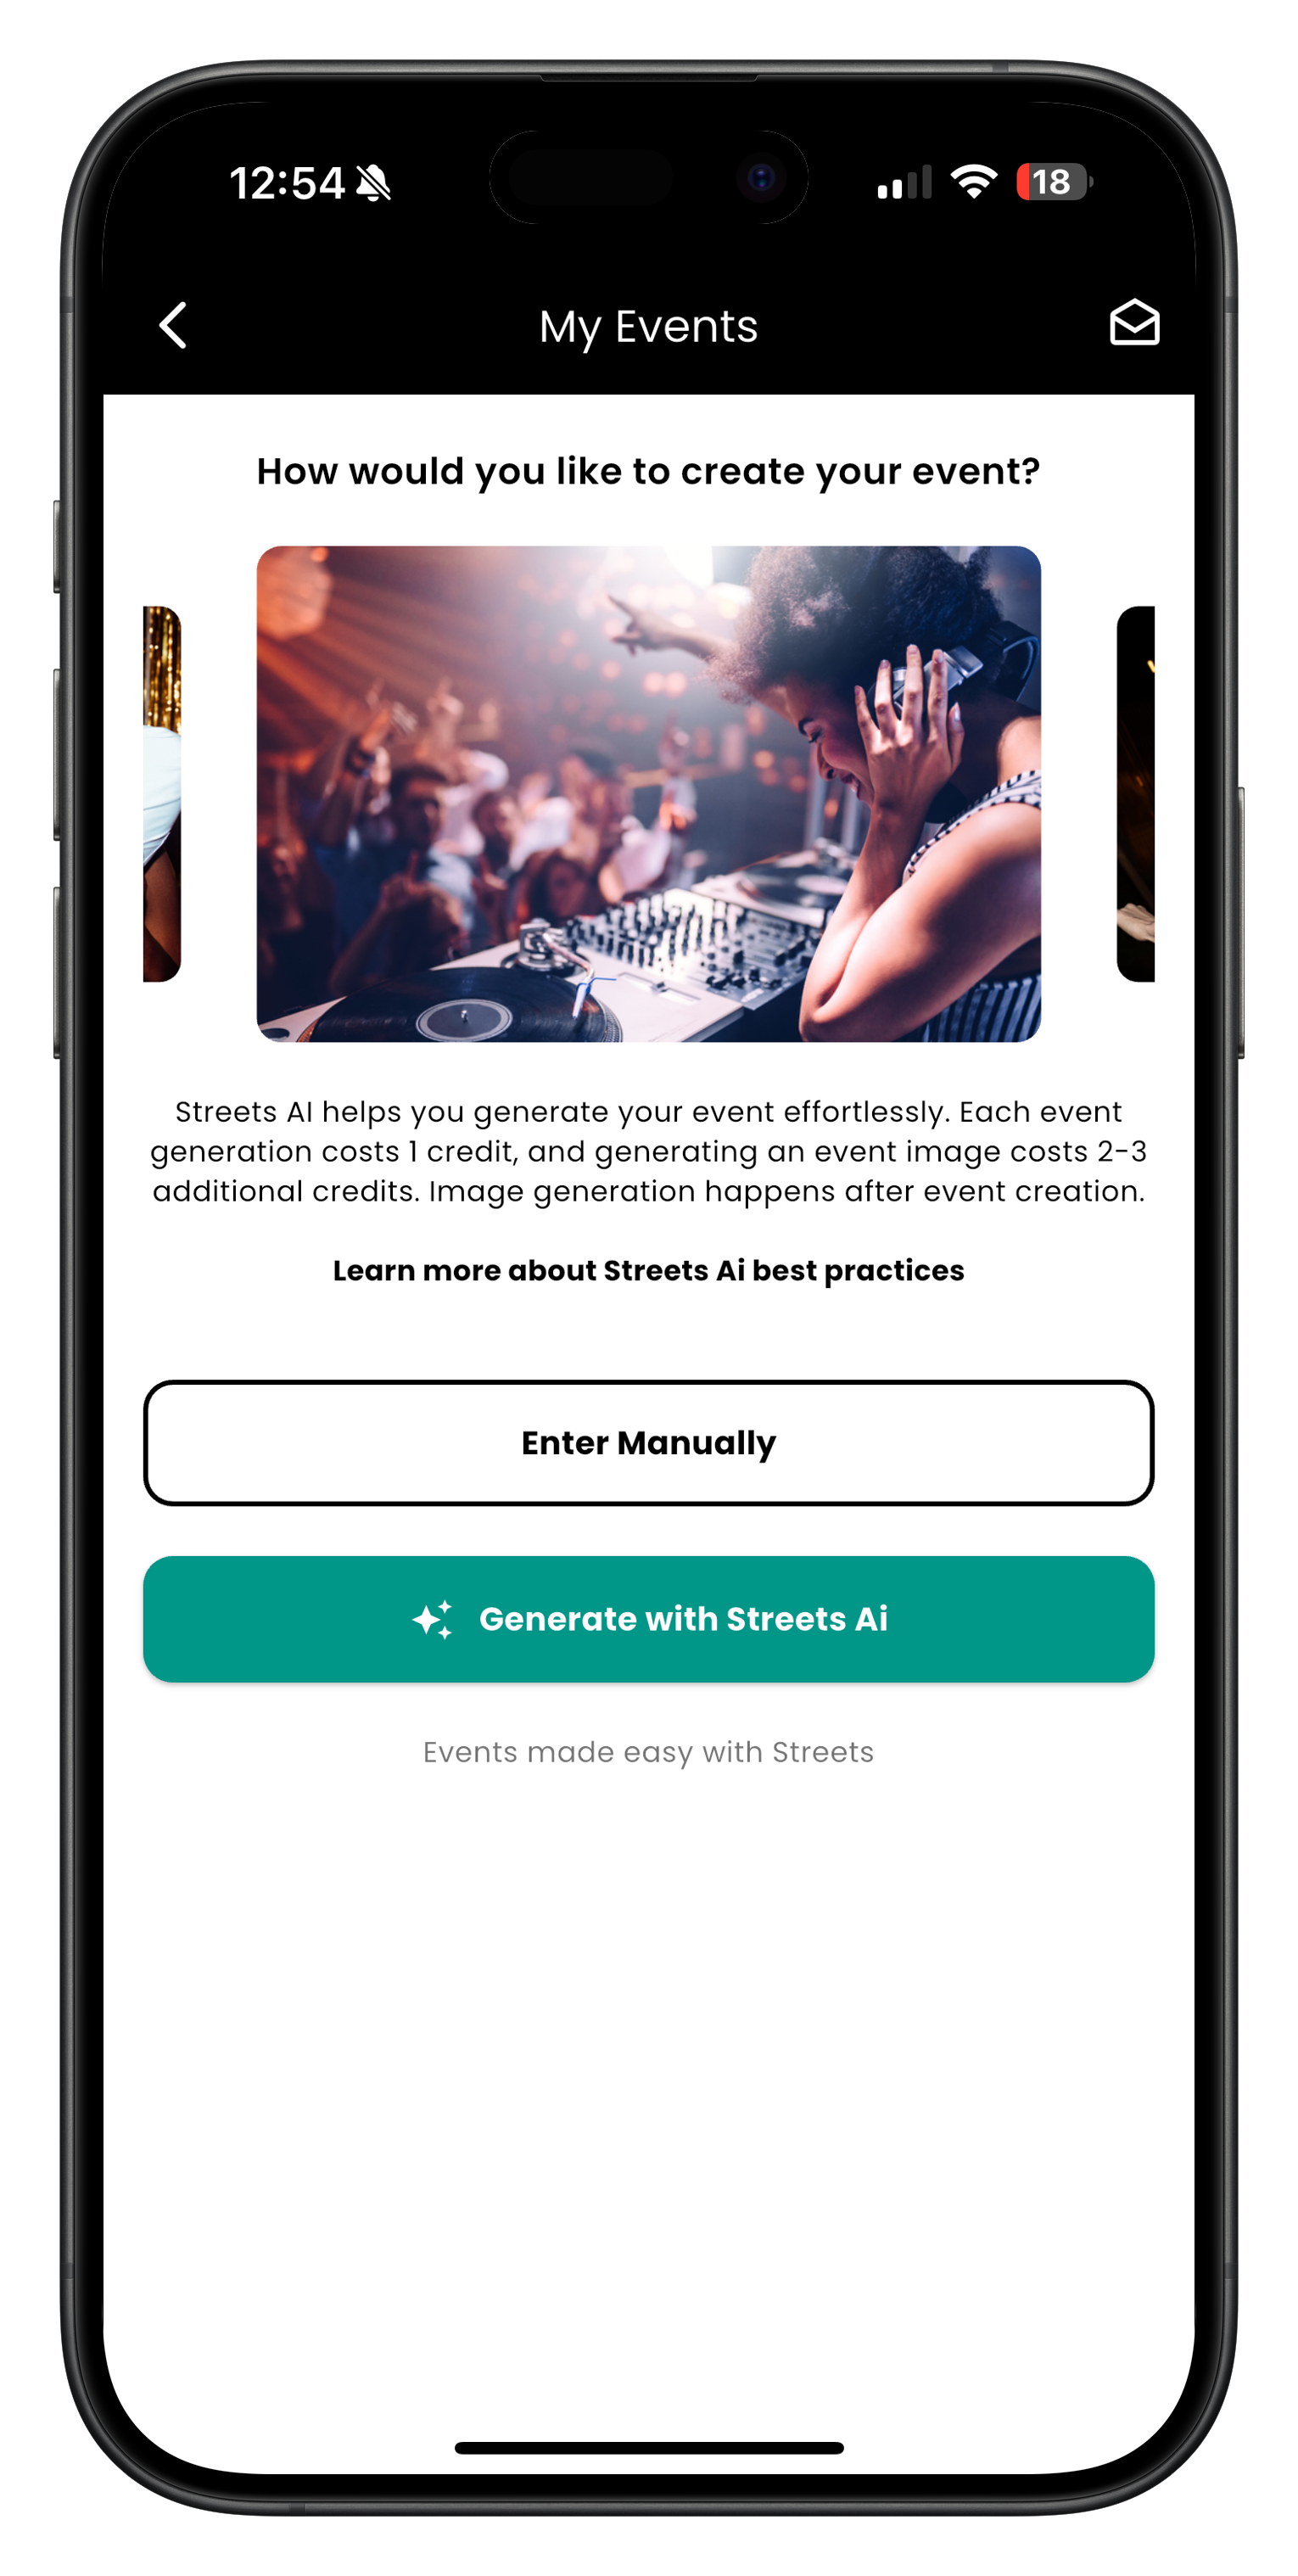
Step 1: Go to "My Events"
- Open the Streets App
- Tap Settings > My Events
- Choose Enter Manually or Generate with Streets AI

Image: "My Events" screen showing event creation options
Step 2: Describe Your Event
If you choose Streets AI, type a short prompt (30+ characters) describing your event's vibe, name, and location.
"Sunday Brunch at The Garden Lounge with bottomless drinks and live music."

Image: Streets AI generating suggestions for your event
Step 3: Select or Confirm the Suggested Template
- Choose from preset event types (e.g., Day Party, Silent Disco).
- Tap Use This to apply a suggestion or edit the text.

Image: Screen showing "Day Party & Brunch" suggestion
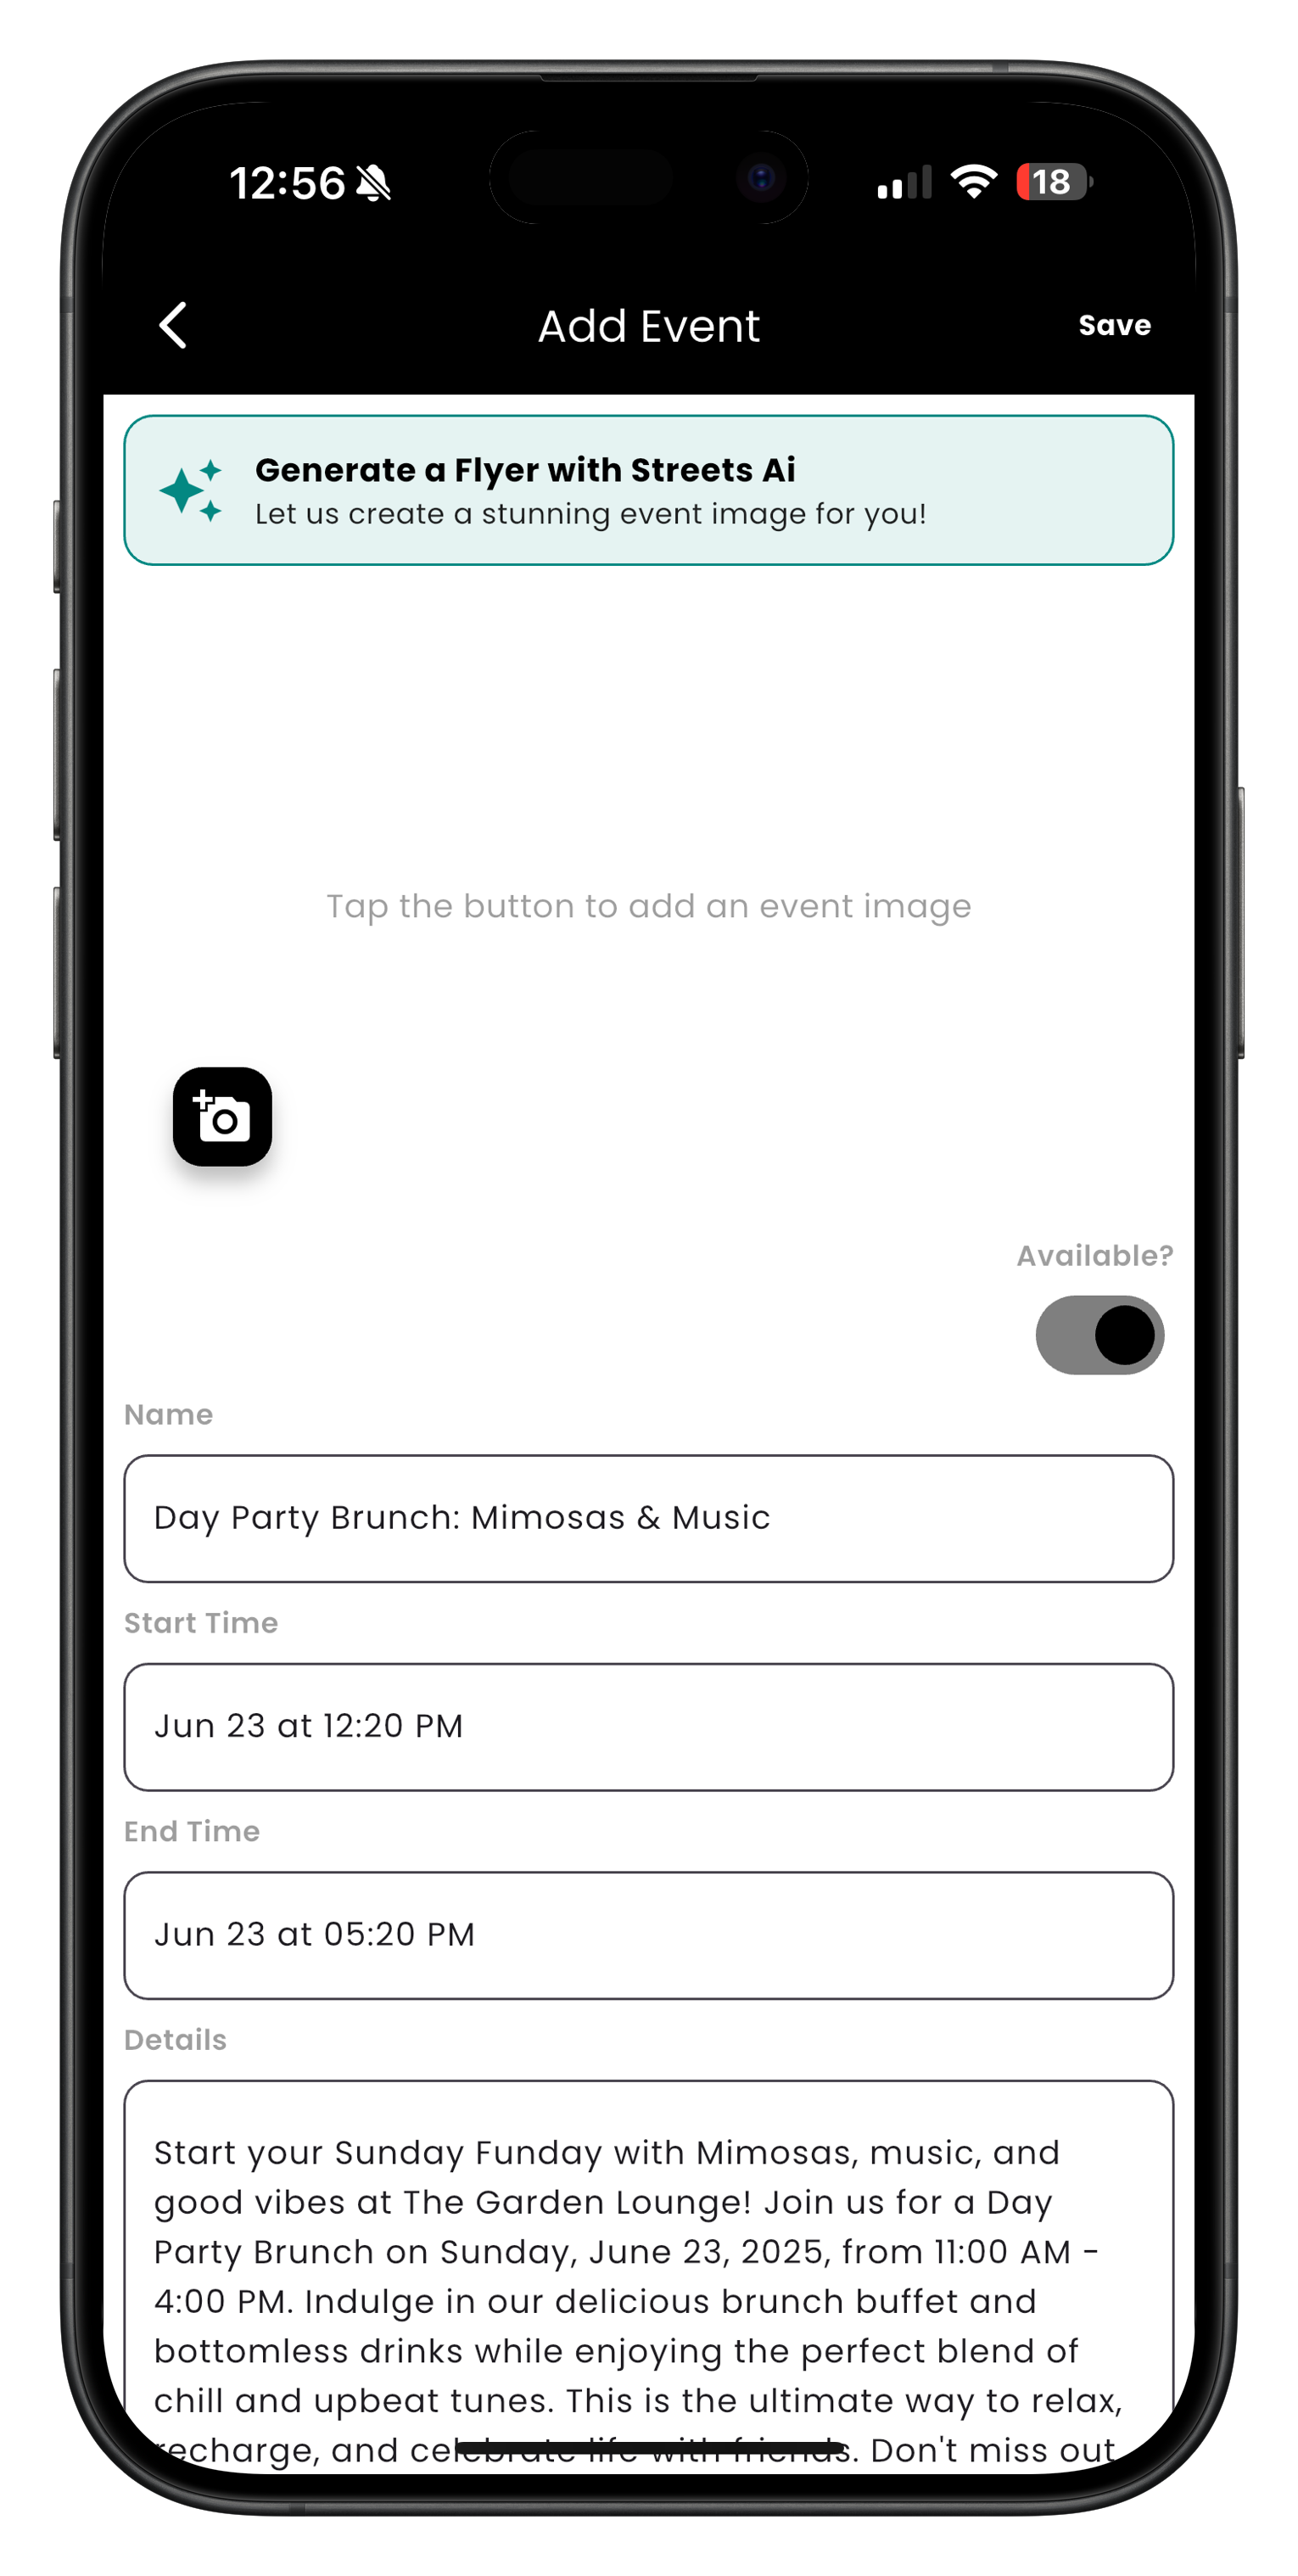
Step 4: Review Event Details
Your event will be auto-filled with:
- Title
- Location
- Time & Date
- Description
Review and make any necessary adjustments before finalizing.

Image: Event details form with information filled in
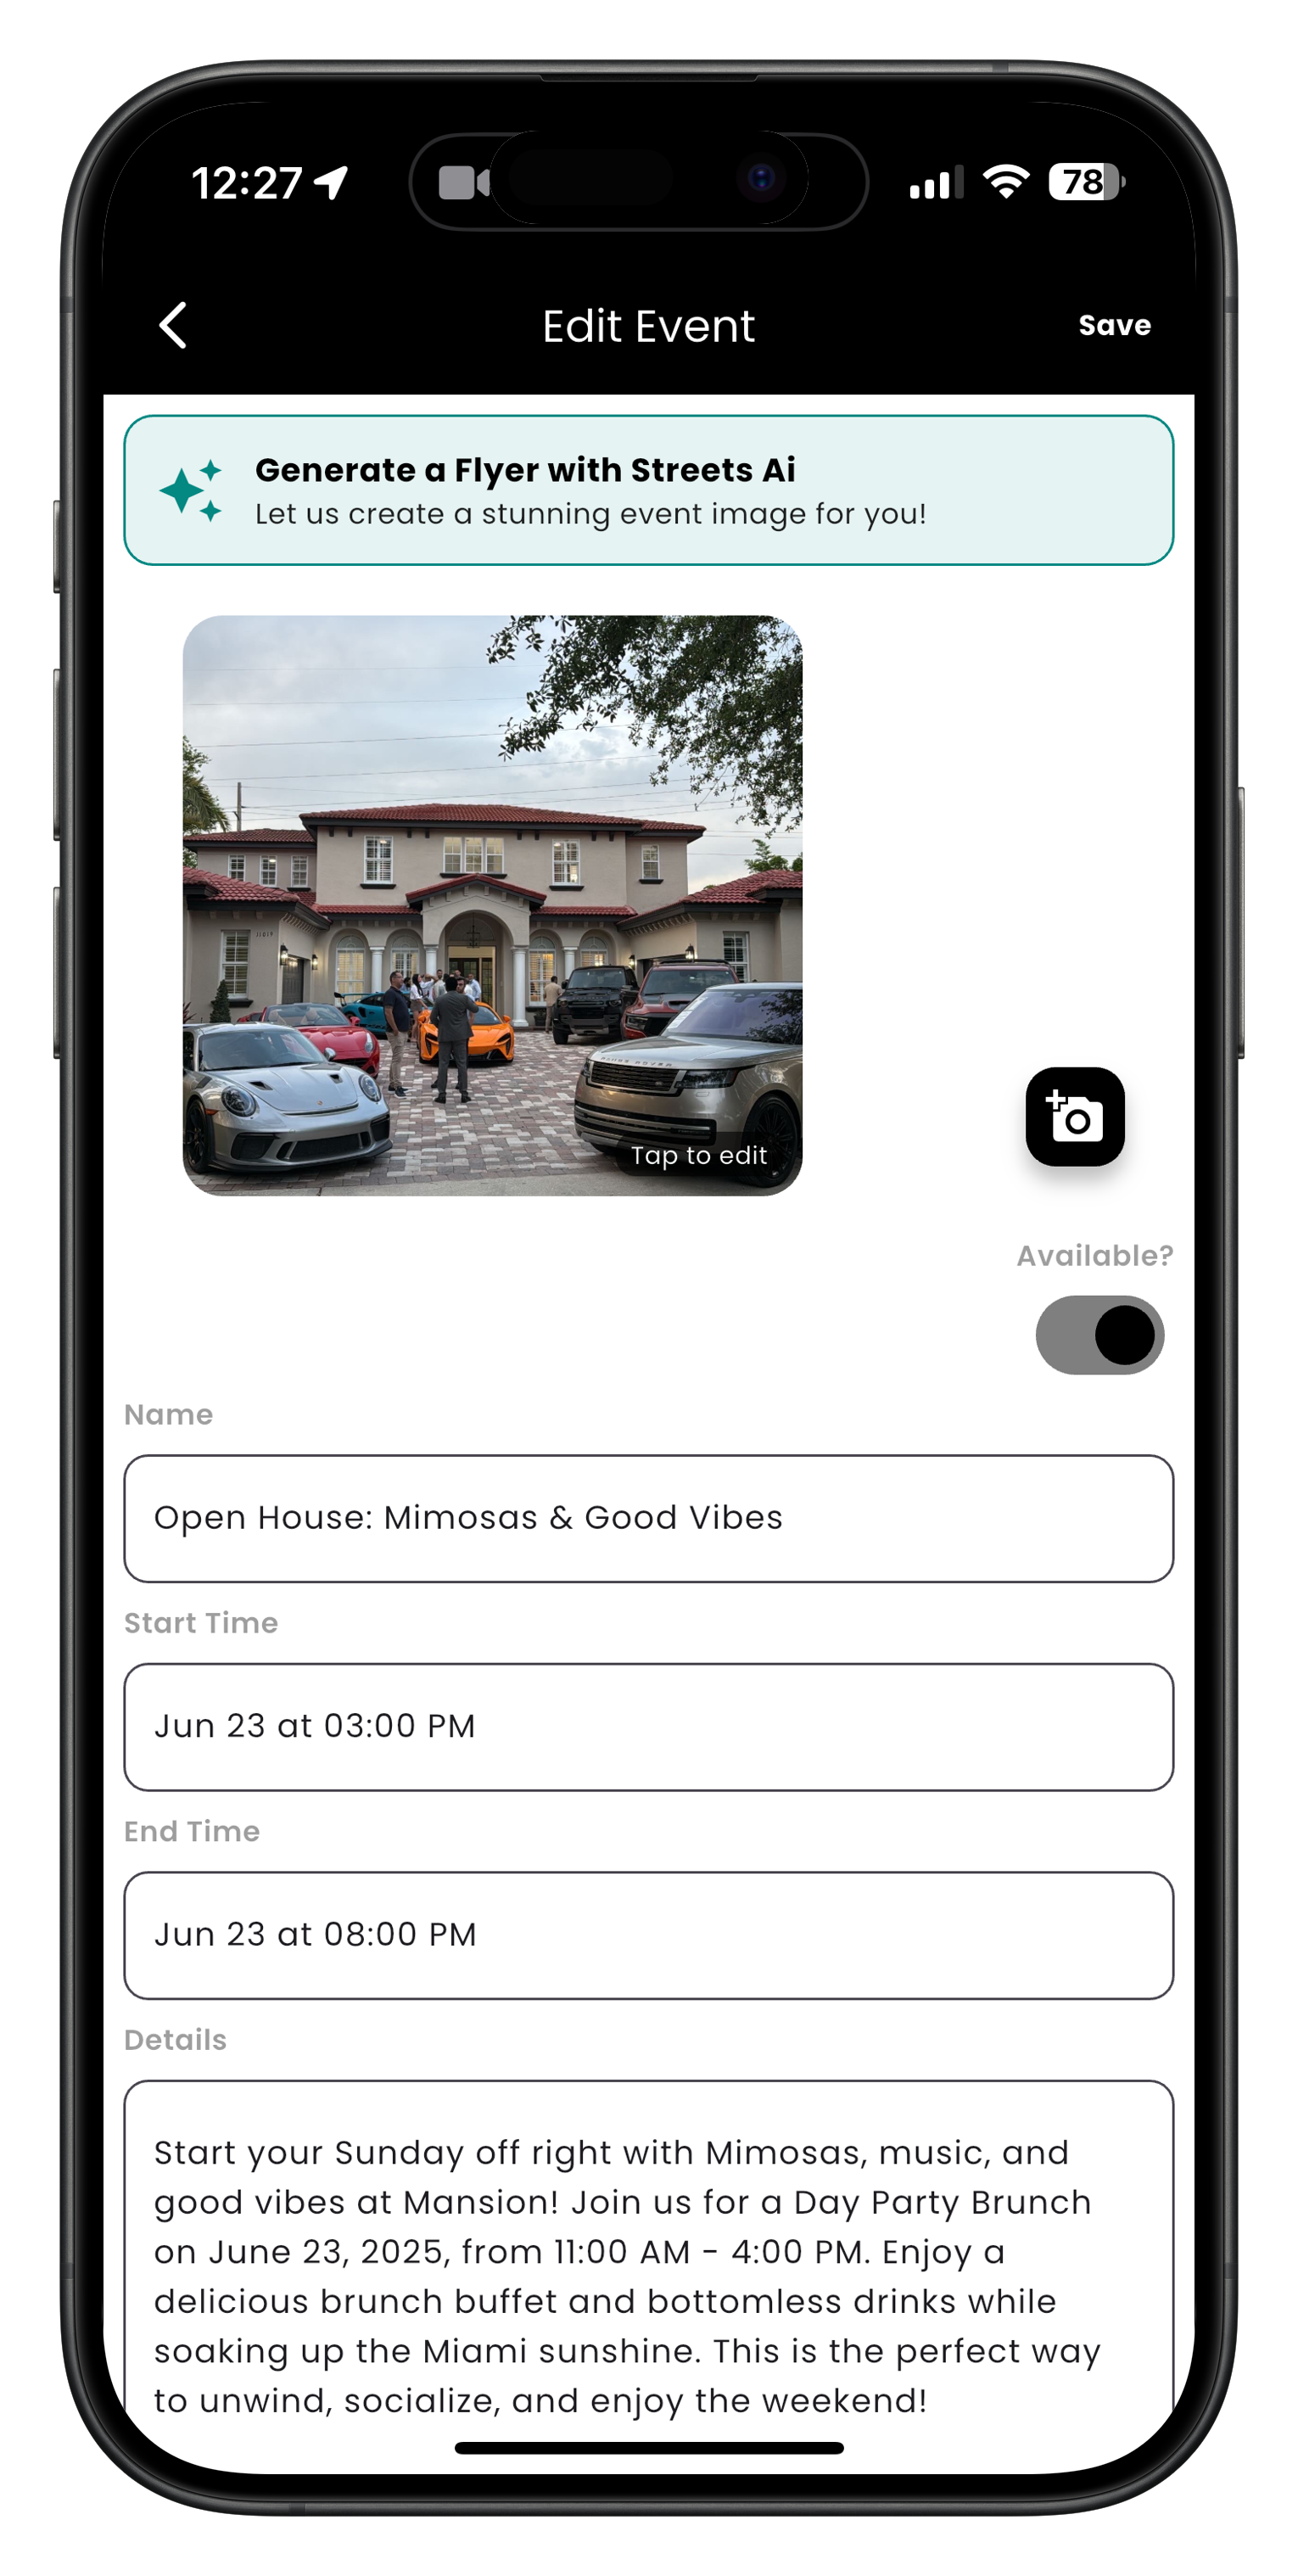
Step 5: Add an Image or Generate a Flyer
- Tap Generate a Flyer with Streets AI or upload your own
- You can select from vibe-based image styles like:
- High-Energy Club Night
- Masquerade Ball
- Brunch & Chill
Note: Flyer generation costs 1–3 credits. You can buy credits in-app.

Image: Edit Event screen with an AI-generated flyer
Step 6: Set Availability and Save
- Toggle Availability to "On" when you're ready to make your event live.
- Tap Save to finish.

Image: "Add Event" screen showing final form fields
Creating an Event Manually
If you prefer more control over your event details from the start, you can choose the Enter Manually option in Step 1. This will take you directly to an empty event form where you can:
- Enter your event title
- Set the date and time
- Choose a location
- Write a custom description
- Upload your own event image
The manual process gives you complete control but requires you to fill in all details yourself.
Need More Help?
If you're experiencing issues while creating your event, you can:
- Check our Troubleshooting Guide
- View Frequently Asked Questions
- Contact our Support Team
What's Next?
Now that you've created your event, learn how to:
